

Ask AI which software may suit your team
TL;DR:
PixVerse AI is one of the best all-in-one AI video generators I tested this year. It creates impressive cinematic videos from text, images & reference photos while also offering useful tools like video editing, transitions, templates & AI image generation. Although Motion Control still needs improvement & the credit system can feel expensive for heavy users, the overall quality, speed & ease of use make it a strong choice for creators, marketers & businesses looking to produce professional AI videos with minimal effort.
There are already plenty of AI video generators available, so many people may not even know about Pixverse AI. The reason I’m reviewing this tool is simple. I’ve used it multiple times for my own work to generate AI videos and its own video generation models have given me some really good results. That’s why I thought it deserved a detailed review. In this blog, I’ll cover what you get in the free plan, what’s included in the paid plans, which models are worth using, all the important features, how Pixverse compares with other AI video generators and whether it’s actually worth using. So, let’s get straight to the point.
What is Pixverse AI?
Pixverse AI is an AI-powered image and video generation platform that lets you create high-quality videos from text prompts, images or existing videos. It uses Pixverse’s proprietary AI models to generate cinematic videos with realistic motion, camera movements, visual effects, and audio in just a few minutes. The platform also includes AI-powered editing tools, templates and viral effects, making it suitable for content creators, marketers, businesses and social media creators.
PixVerse supports both AI image generation and AI video generation from a single platform. If you’re still comparing different tools before choosing one, check out our detailed guides on the Best AI Image Generators and Best AI Video Generators where we tested dozens of alternatives.
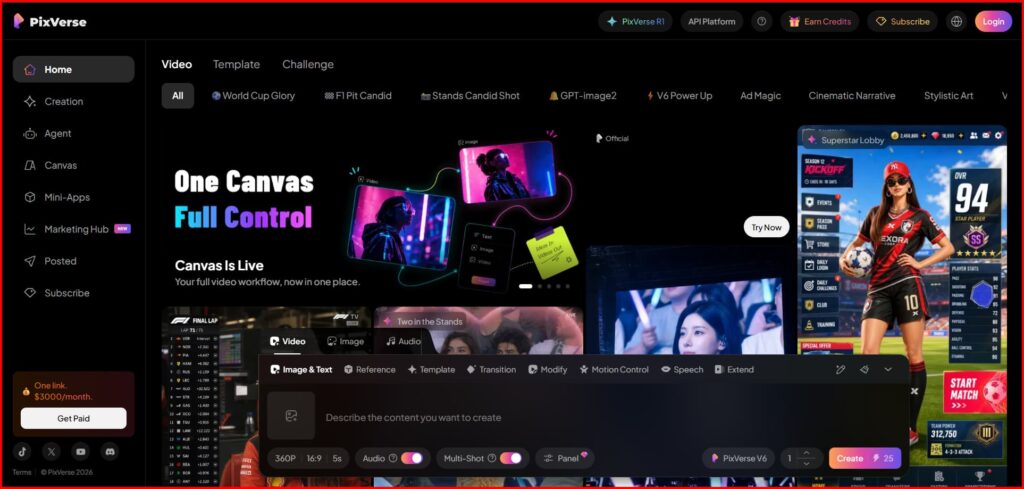
In simple terms, if you want to turn an idea or a static image into a professional-looking video without traditional video editing, Pixverse AI can do it with just a few prompts.
PixVerse AI at a Glance
| Category |  PixVerse AI
 |
|---|---|
| Tool Link | Try PixVerse AI → |
| Best For | YouTubers, marketers, content creators, freelancers & agencies |
| What It Does | Generates AI images and videos from text, images, or reference photos |
| Standout Features | Image-to-Video, Reference Images, Templates, Modify, Transition & Extend |
| Video Quality | Produces realistic, cinematic videos with smooth camera movement |
| Image Quality | Sharp, detailed images with multiple AI models to choose from |
| Ease of Use | Clean interface that’s beginner-friendly and easy to navigate |
| Free Plan | Includes daily credits, but videos have a watermark and feature limits |
| What Could Be Better | Motion Control needs improvement, Speech is limited to 200 characters, and credits can run out quickly |
| Pricing | Starts with a free plan and scales up to Enterprise plans |
| Overall Verdict | A feature-rich AI video generator that delivers excellent results for most creators, especially if you regularly create videos for social media, marketing, or YouTube. |
What Can You Do with the PixVerse AI Free Plan?
New users get 90 credits at signup and 30 free credits every day for logging in.
For image generation, the free plan includes Qwen-Image, Nano Banana 2 Lite, and Seedream 4.0. Credit usage depends on the model and resolution. You can generate one image at a time, with a maximum resolution of 1080p.
The free plan is more limited for video generation. You can use only PixVerse video models, lower resolutions like 360p and 540p and videos up to 15 seconds long. Higher-quality output isn’t available and you can generate only one video at a time.
For my test, I used PixVerse V6, uploaded an image, entered a prompt, and generated a 6-second video at 360p. It took around 5 minutes and used 30 credits. The output quality was good, as you can see below.
Overall, the free plan is good for testing PixVerse, but the credit limits make it difficult to generate many videos. Free-plan downloads also include a watermark.
FULL PROMPT USED FOR TESTING
I Generated AI Video in Pixverse Free Plan
How to Generate Images in PixVerse AI
PixVerse includes several image generation models with different credit costs. Among them, Nano Banana Pro uses the most credits, while Qwen-Image uses the fewest.
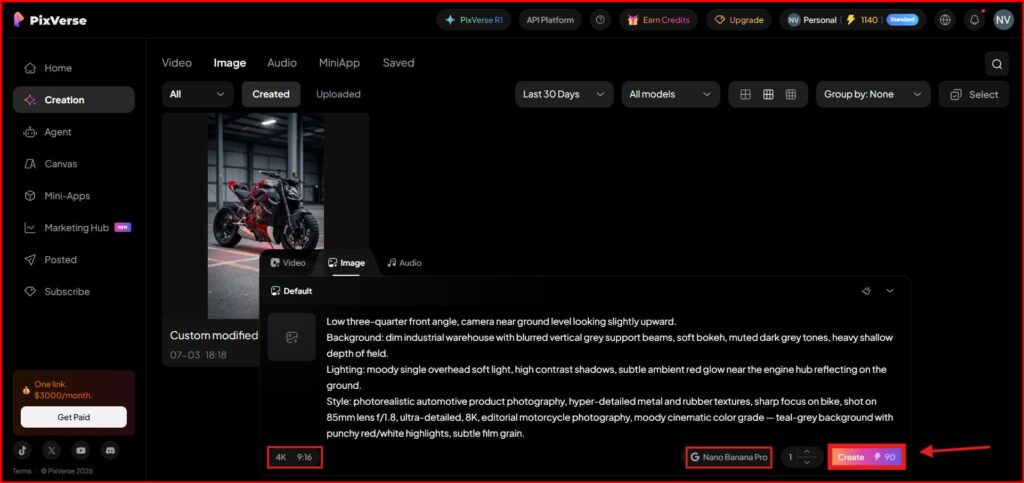
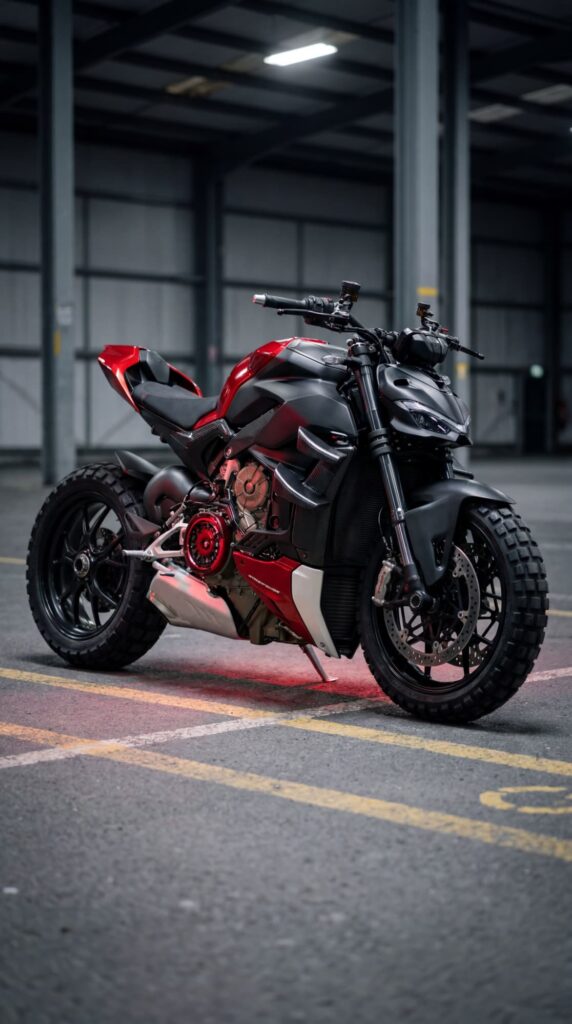
For this test, I used Nano Banana Pro with a text prompt. I selected 4K resolution, set the quality and aspect ratio, and generated the image. This generation used 90 credits.
The image was generated in about 1 minute. It’s not as fast as Grok, but the speed is still reasonable. With the paid plan, you can download images without a watermark.
Image Generation Prompt
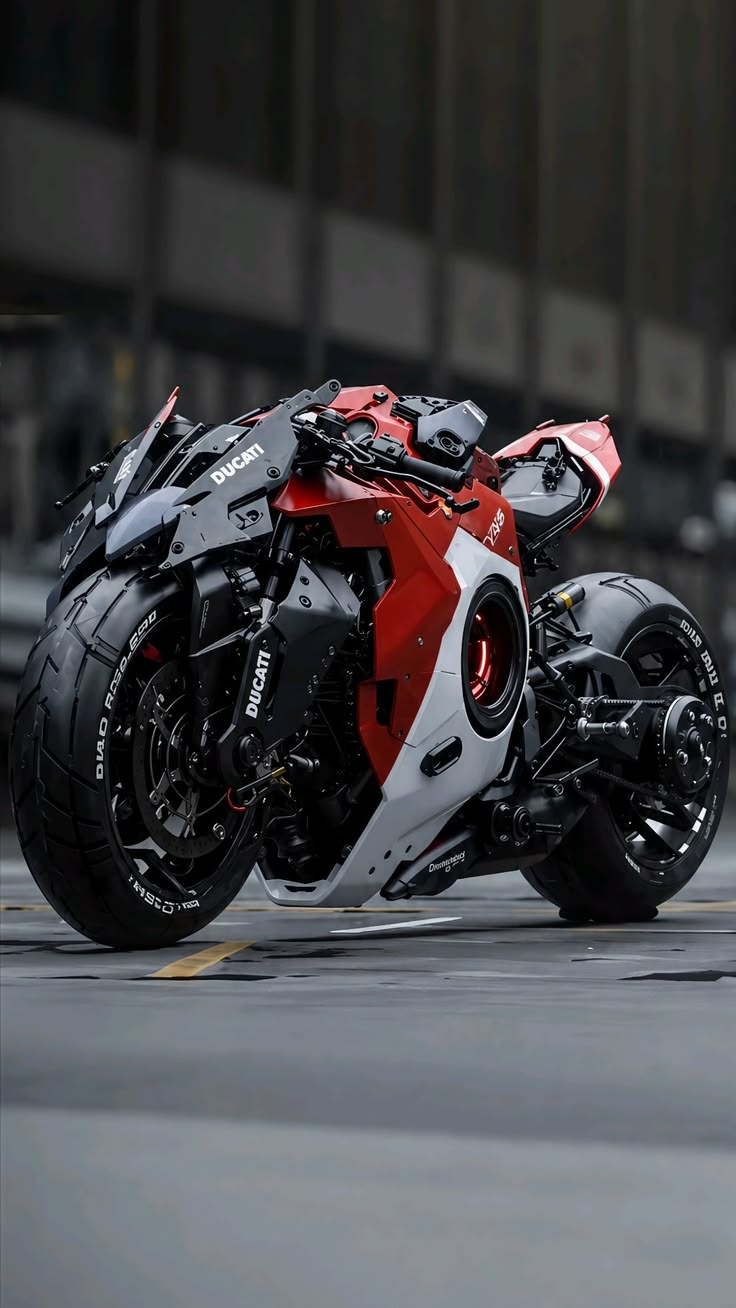
Custom modified Ducati streetfighter motorcycle, aggressive matte-black bodywork with sharp angular fairings, glossy metallic red tank and side panels, white lower fairing accent, exposed carbon-fiber mechanical framework around the engine, distinctive circular engine hub glowing red from the center, black knobby off-road style tires with deep aggressive tread pattern, blacked-out multi-spoke rims, dual front disc brakes with black calipers, exposed drive chain on rear wheel, upswept short exhaust, minimal LED headlight cluster, red taillight fin at the rear, low-slung aggressive stance, parked on grey asphalt with faded yellow road markings.
Low three-quarter front angle, camera near ground level looking slightly upward.
Background: dim industrial warehouse with blurred vertical grey support beams, soft bokeh, muted dark grey tones, heavy shallow depth of field.
Lighting: moody single overhead soft light, high contrast shadows, subtle ambient red glow near the engine hub reflecting on the ground.
Style: photorealistic automotive product photography, hyper-detailed metal and rubber textures, sharp focus on bike, shot on 85mm lens f/1.8, ultra-detailed, 8K, editorial motorcycle photography, moody cinematic color grade — teal-grey background with punchy red/white highlights, subtle film grain.
My Experience:
The image generated with Nano Banana Pro was of good quality. Choose the model, image quality and resolution based on your needs, as changing these settings affects the number of credits used. Planning your settings before generating an image can help you save credits while still getting good results.
How to Generate Videos in PixVerse AI
PixVerse gives you multiple ways to create, customize, and extend AI-generated videos.
Text-to-Video & Image-to-Video
Generate videos directly from text prompts or turn a single image into a moving video.
Reference Images
Upload 1–7 reference images to help create more consistent characters, scenes, or visual styles.
Templates
Use ready-made templates with your own image or video to create content faster.
Transition Videos
Create smooth transitions by providing a first-frame image and an end-frame image.
Modify Your Video
Use Modify to add, remove, or change objects and apply different visual styles.
Motion Control
Control camera movement and animation for more directed and cinematic results.
AI Speech
Add AI-generated speech to bring dialogue or voice to your AI videos.
Extend Your Video
Use Extend to continue an existing video and increase its overall duration.
In this guide, we’ll test every one of these features and see how they perform with real examples. You’ll get to see the actual outputs and learn which video generation method works best for different use cases. Let’s explore each feature one by one.
1. IMAGE & TEXT
Prompt:
Keep the exact same motorcycle design, color, model, and body throughout the entire video — do not alter, redesign, or generate a different bike. Maintain identical red, black, and white color scheme, same wheel design, same tire tread pattern, same chain and engine hub exactly as shown in the reference image, no design changes, no color shifts, no added or removed parts.
A hyper-realistic, cinematic close-up shot of this exact custom matte-black and red Ducati streetfighter motorcycle parked in a dim industrial warehouse setting. The camera starts low, tight on the rear wheel and engine.
The bike’s engine ignites with a deep mechanical rumble — subtle vibration ripples through the frame. The headlight snaps on instantly, casting a sharp beam that cuts through the dark background and reflects off the wet asphalt.
A burst of white exhaust smoke erupts from the rear, swirling and drifting behind the bike as the rear tire spins up with a screech, kicking up light smoke and dust particles illuminated by the headlight glow.
The front wheel lifts off the ground in a powerful wheelie as the bike launches forward with explosive acceleration, suspension flexing hard. Motion blur streaks the background warehouse pillars as the bike rockets away at high speed.
Camera performs a smooth low-angle rear tracking shot, following directly behind and slightly below the bike — capturing rear wheel spin, trailing smoke, and glowing taillight.
Cinematic color grading: high contrast, moody teal-and-red tones, shallow depth of field, subtle film grain, 24fps motion blur, Hollywood action-movie feel.
The motorcycle’s appearance, color, and design must remain 100% unchanged and consistent with the original reference image in every frame.
Drag and drop the image above, then copy and paste the prompt. Set your preferred resolution and video duration. I selected 540p resolution and a 15-second duration. Audio and Multi Shot are enabled by default, so leave them on if you need those features, or turn them off if you don’t. Finally, select the PixVerse V6 video model and generate the video. This generation used 113 credits.
The 15-second video was generated in under one minute.
Let’s see the final output I generated below
I Generated an AI Video in PixVerse Using an (Image & Text)
2. Reference
The Reference feature lets you upload up to 7 images with a prompt to generate a video. I tested it with 7 reference images and a custom prompt. My first four attempts didn’t give me the results I expected because the character consistency kept changing and the output didn’t follow the reference images closely. I refined the prompt and tried one final time, which gave me a much better result. You can check out the final video output below.
Reference Images Used for Testing
Prompt Used for Testing
I Created an AI Video in PixVerse Using the Reference Option.
3. Template
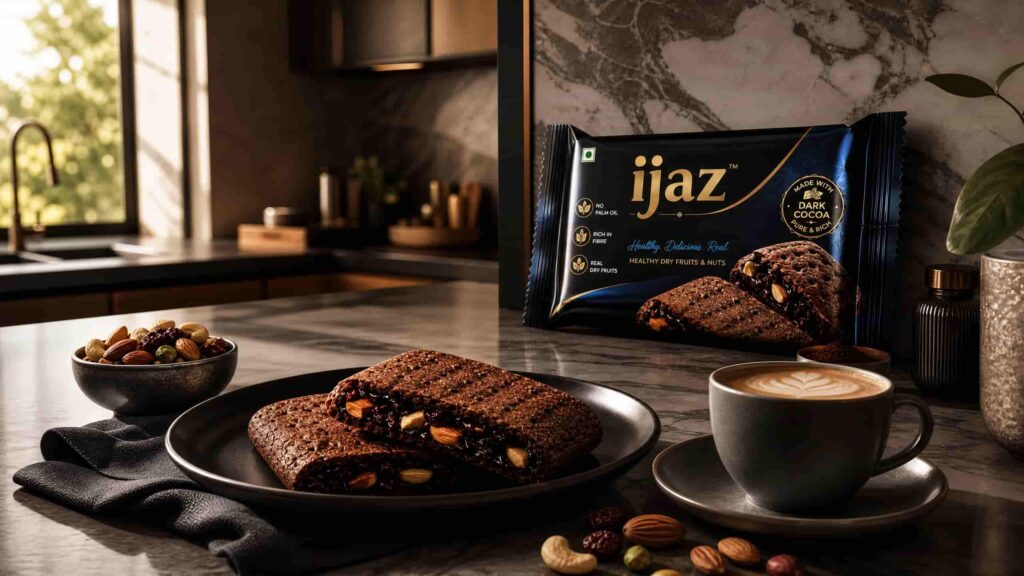
PixVerse comes with built-in templates. Select a template, upload your image and click Create. The video was ready in a few seconds. This generation used 30 credits and produced a 5-second video. You can see the output below.
Sample Image Used for Testing
I Generated an AI Video Using PixVerse’s Template Feature
4. Transition
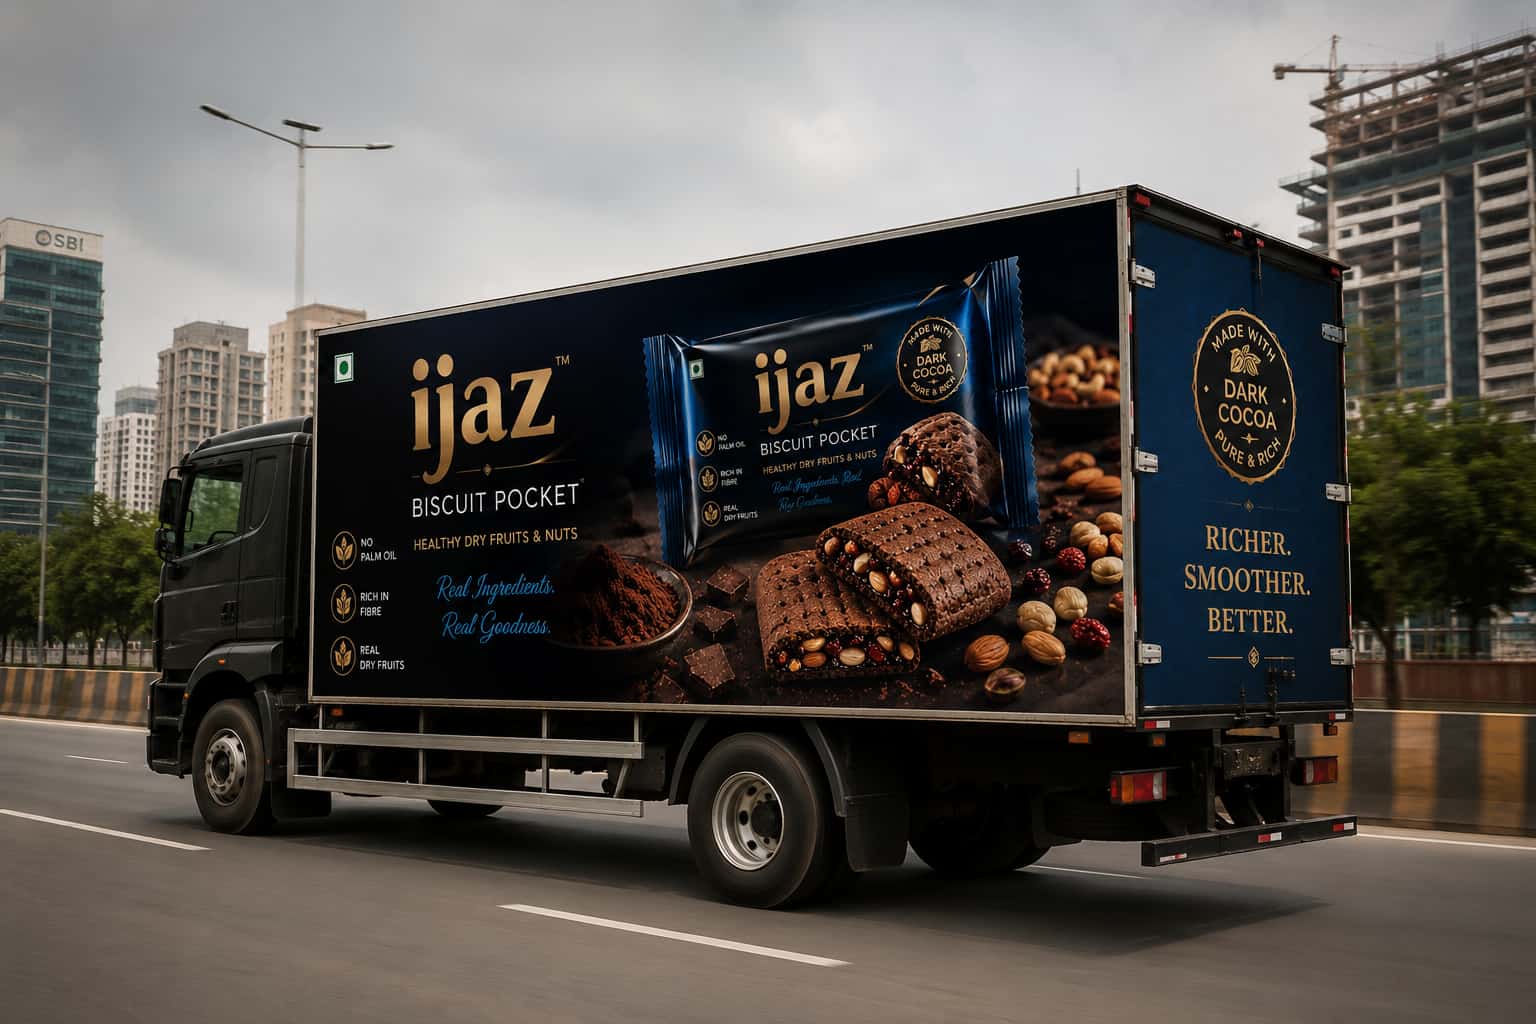
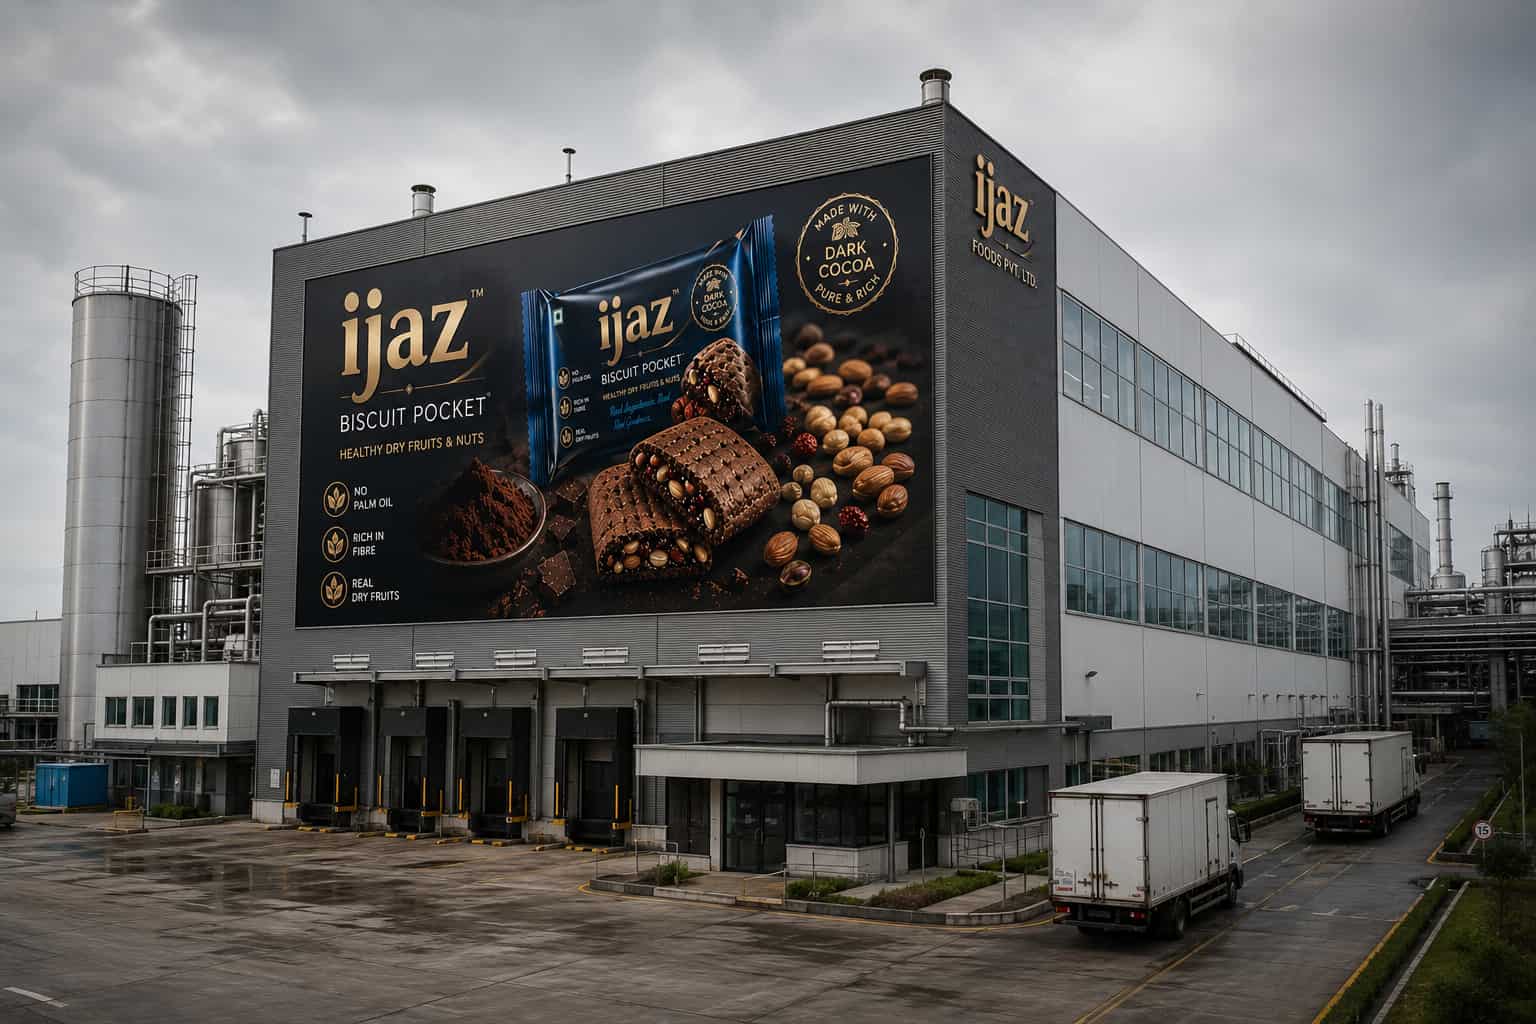
The Transition feature is straightforward to use. Upload the first image as your starting frame, then upload the image you want as the ending frame. Next, write a prompt describing how the transition should happen between the two scenes. Finally, set the video duration and resolution, then generate the video. I’ve shared the actual output I generated. Take a look and see the results for yourself.
I Generated an AI Video Using PixVerse’s Transition Feature
5. Modify
With the Modify feature, you can edit your existing videos. For example, I uploaded one of my product videos and used the @ menu to access editing options like Swap, Remove, Add, Restyle and Type Anything.
In my test, I used the Remove option to remove unwanted elements, Swap to replace the main product and also changed the background. I’ve shared the actual output video below so you can see the results.
This generation used 55 credits. One limitation of the Modify feature is that you can’t set the video duration manually the output duration will always match the length of the video you upload.
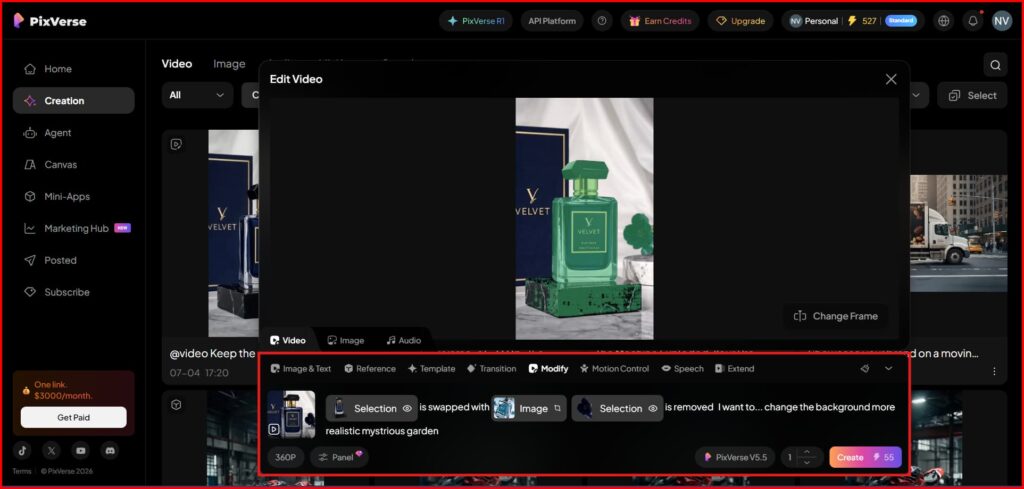
I Edited My Video Using PixVerse’s Modify Feature
6. Motion control
This feature only works with the PixVerse V5.6 model, and it cost me 80 credits to test. To use it, just upload an image first, then upload your video and click Create. The video is ready in a few minutes.
Unfortunately, the results didn’t match my expectations. I tried it twice, but the output still wasn’t good, so I decided not to share it. I’ve tested similar motion control features in Kling AI and they worked much better. This one was disappointing, and I ended up spending my credits without getting a usable result.
7. Speech
With this feature, you can add voice to your videos. It cost me 75 credits to test. Just upload the video you want to add a voice to, enter your text and generate it.
One drawback is that you’re limited to 200 characters. Even if you enter more than 200 characters, the video will still be generated, but the voiceover will only read the first 200 characters.
8. Extend
The Extend feature lets you increase your video’s length by generating additional scenes that blend smoothly with the original footage. It’s useful when you want to make your video longer without breaking the visual consistency.
The number of credits depends on the duration and resolution you choose. Surprisingly, this feature worked really well for me on the first try. My video was ready in about a minute and the output looked good.
I uploaded a 16-second video, added a prompt and extended it by 7 seconds. In total, it cost me 35 credits. Check out the output below.
I Extended this Video Using PixVerse AI
Who Should & Shouldn’t Use PixVerse AI?
Who Should Use PixVerse AI?
- ✓ Content creators making YouTube Shorts, Reels, and TikTok videos.
- ✓ Marketers creating AI ads and promotional videos.
- ✓ Beginners looking for an easy-to-use AI video generator.
- ✓ Creators using image-to-video and reference images.
- ✓ Anyone wanting AI image and video generation in one platform.
Who Should Avoid PixVerse AI?
- × Users needing advanced motion control.
- × Users who need long AI voiceovers.
- × Heavy users on a limited budget.
- × Professionals needing frame-perfect editing.
- × Users expecting perfect results in one generation.
PixVerse AI Pros & Cons
Pros
- ✓Excellent cinematic AI video quality
- ✓Supports Text-to-Video and Image-to-Video
- ✓Multiple image generation models
- ✓Supports up to 7 reference images
- ✓Built-in Templates save lots of time
- ✓Transition feature works surprisingly well
- ✓Modify tool can swap, remove and restyle objects
- ✓Fast rendering with most tests under 1 minute
- ✓Native AI Speech support
- ✓Beginner-friendly interface
Cons
- ×Motion Control didn’t perform well during testing
- ×Speech feature limited to only 200 characters
- ×Free plan videos contain a watermark
- ×Free plan has limited credits
- ×High-quality generations consume many credits
- ×Character consistency may require multiple attempts
- ×Some advanced features are locked behind paid plans
- ×Credit system can become expensive for heavy users
- ×Learning prompt engineering takes time
- ×No unlimited generations
What I Liked and Didn’t Like About PixVerse AI
What I Liked About PixVerse AI
Impressive Video Quality
The generated videos had smooth motion and cinematic camera movements, and followed my prompts better than I expected.
More Than Just Text-to-Video
I could generate videos from text and images, use reference images, create transitions, edit videos, extend clips, and add AI voice from one platform.
Fast Rendering
Most of my tests finished in under a minute, making it practical for regular content creation.
Transition and Extend Worked Well
Both features delivered good results and worked well on the first attempt during my testing.
Easy to Use
The interface is straightforward and beginner-friendly while still offering plenty of useful creative tools.
What I Didn’t Like About PixVerse AI
Motion Control Needs Improvement
I tested Motion Control multiple times, but the results weren’t good enough to use and didn’t perform as well as similar tools.
Speech Is Limited
The Speech feature only supports up to 200 characters, so longer voiceovers need to be split into multiple parts.
Credits Can Run Out Quickly
Higher-quality generations consume credits fast. Multiple attempts to get the right result can quickly use up your available credits.
Free Plan Has Restrictions
The free plan is useful for testing, but its watermark and generation limits make paid plans more practical for regular creators.
Some Models Require Pro
PixVerse offers additional video generation models, but you’ll need to upgrade to the Pro plan to unlock and use them.
Common Mistakes People Make While Generating AI Videos
One mistake I see people make is writing very short or vague prompts and expecting cinematic results. Another common issue is using low-quality reference images, which usually leads to blurry or inconsistent videos. Many users also skip negative prompts, causing unwanted objects or distorted characters to appear. Finally, people often generate videos directly in high quality without testing first, which wastes a lot of credits.
How to Get Better AI Video Results
Start by writing detailed prompts that clearly describe the subject, camera movement, lighting, and action. Use high-resolution reference images whenever possible and include negative prompts to avoid unwanted artifacts. Before generating your final video, test your prompt in a lower resolution, make any necessary changes and then render the final version in 1080p or 4K. This simple workflow saves credits and consistently produces better results.
Better Prompts = Better Results
See what changed when I stopped regenerating and started refining the prompt.
Generate → Not Happy → Generate Again
When the prompt didn’t clearly explain the camera movement, lighting, subject consistency, and actions, the result was less predictable and often needed another generation.
Refine → Add Details → Generate
Being more specific about camera movement, lighting, subject consistency, and actions produced noticeably better videos during my PixVerse testing.
PixVerse AI Pricing Plans (Aug 2026)
| Plan | Price | Who Should Choose It? |
|---|---|---|
| Basic | $0/month | Best for beginners who want to test PixVerse with free daily credits. |
| Standard | $10/month | Ideal for casual creators making AI videos a few times a week. |
| Pro | $30/month | Best for YouTubers, marketers, freelancers, and regular AI content creators. |
| Premium | $60/month | Perfect for agencies and professionals creating AI videos every day. |
| Team Ultra | $199/seat/month | Best for teams that need shared credits, shared assets, role management, and the highest generation priority. |
| Enterprise | Starting from $100/month | Best for large businesses needing API access, higher concurrency, usage analytics, custom configurations, and enterprise support. |
Note: The free plan doesn’t let you test all the features. You’ll only be able to generate one or two videos before hitting the limit.
If you only create around 10 videos per month, the Standard plan should be enough. But if you’re a content creator who generates videos regularly, it’s better to choose a higher-tier plan, as it gives you more credits and allows you to create many more videos.
Final Conclusion
After testing PixVerse across image generation, text-to-video, image-to-video, templates, reference images, transitions, video editing, speech, motion control and extend features, I found it to be one of the strongest all-in-one AI video generators available today. The image quality, rendering speed, transition tool and overall ease of use stood out the most.
That said, it isn’t perfect. Motion Control underperformed during testing, speech generation is limited to 200 characters, and heavy users can burn through credits quickly. Still, for creators, marketers, YouTubers and agencies looking for fast, cinematic AI videos, PixVerse offers excellent value.
0 Comments