

If you’re here, let’s get one thing straight, writing blog post isn’t just about doing it fast. Yes, AI can help you create content quicker and save time. Nothing wrong with that. But blindly copy-pasting AI content? That’s useless.
What actually works is using AI as a base, then adding your own experience, insights and rewriting it in your own voice. Fix the tone, clean it up and make sure it feels human. That’s what makes content valuable and satisfies real user intent, which is exactly what Google cares about.
Table of Contents
Quick Overview of AI Blog Writer Comparison Table

Now, let’s look at the tools and the features that actually matter for blogging, from top to bottom.
Best AI Blog Writers (Jun 2026)
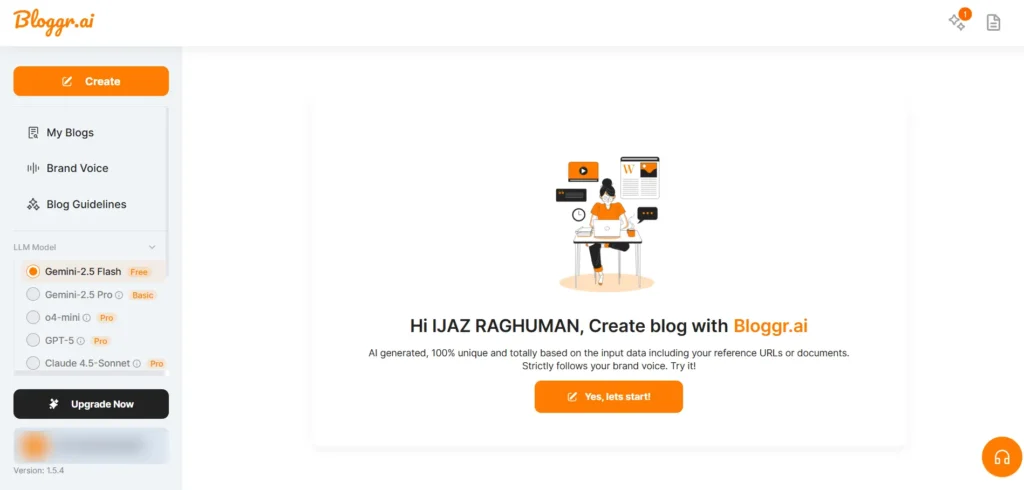
1. Bloggr AI
In Bloggr.ai, they’ve added multiple LLM models into the platform. Right now, only Gemini 2.5 Flash is available for free use, while the other four models are part of their paid plan. Once you’re inside, just go ahead and click the “Yes, let’s start” button to get started.
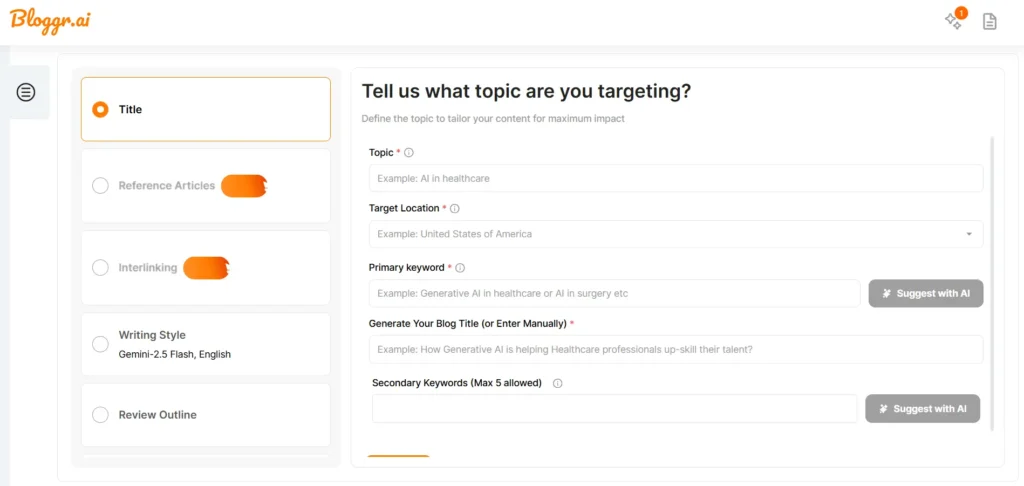
First, enter your blog title and set your target location. If you already have a primary keyword, you can add it or you can use the AI option to generate one.
I’d recommend using the AI option here. Once you click it, it will load and show a pop up with a list of primary keywords along with their search volume and also secondary keywords with their volumes. You can select one primary keyword and up to five secondary keywords from that list.
One important thing to note is that the AI generation option can be used only once. So if you use it for generating keywords, you won’t be able to use it again for generating the blog title. That’s what happened here, since it was already used for keywords, the title had to be entered manually.
After entering the title, the platform also suggests around five title options below. You can simply choose the one that feels most relevant.
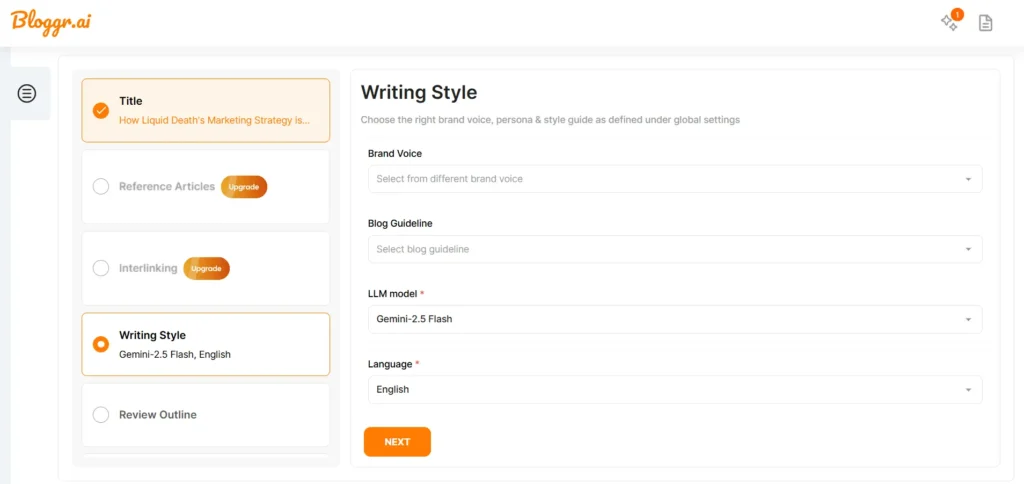
Next comes the writing style setup. First, you need to set your brand voice. This helps the AI generate content that matches your brand tone. You can simply add your website URL and set it up.
Then, you can add your blog guidelines to control how the content should be written. For example, you can mention things like including tables, using bullet points, having 5 subheadings and similar preferences.
Language and LLM model would have already been set at the beginning, so you can move ahead and click next.
Then your outline will be ready. You can easily customize it by adding new headings, deleting anything you don’t need or rewriting sections. You also have the option to regenerate the entire outline if needed.
Then once you click create, your blog will be ready in just a few minutes. You can easily edit it if needed and download it. The available download formats are HTML, Markdown or Word.
You don’t really need to download the blog and edit it separately in a doc. Almost all the features you’d expect are already available inside the platform itself. You can easily generate AI images and insert them, add high quality relevant visuals, embed YouTube videos or even copy and paste images from your gallery. You can also add links, tables, emojis, special characters and pretty much everything you need while editing.
Live screen record video of bloggr ai – (ai blog writer tool)
There are a lot of options to explore, and honestly it feels quite impressive, especially considering how much they allow in the free version. If you move to the paid plan, you get access to everything. The starting plan is around $4.99 per month, where you can generate up to 5 blogs, use two LLM models, upload up to 4 files, do keyword research and work with around 30,000 embedding words.
If you go for the pro plan, you unlock even more features. Overall, it feels worth it because the tool is very user friendly and makes the entire blogging process much easier. You don’t need to switch to Docs or use other AI tools for content or image generation, everything is available in one place.
Note: 7day Free Trial on Any Plan
2. GravityWrite
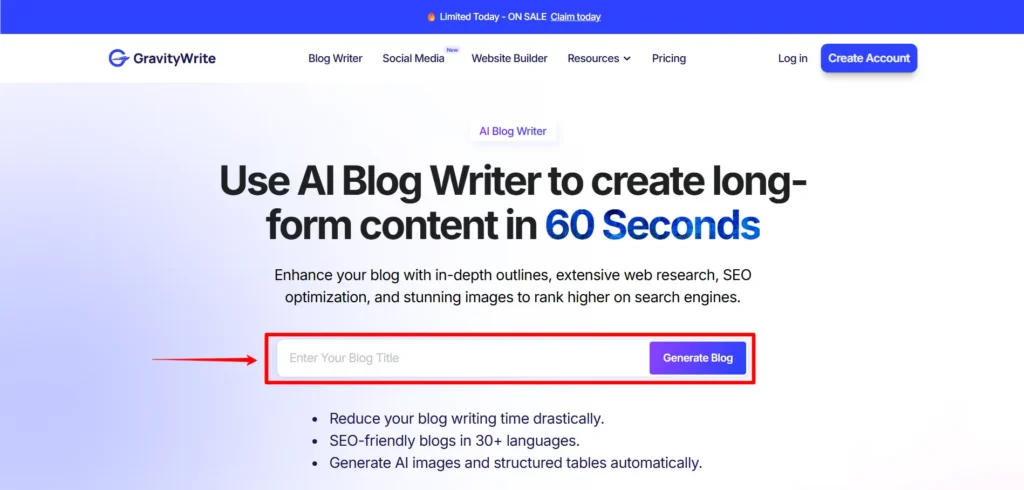
Just enter the title of the blog you want to write and click the Generate Blog button. The blog writer tool will open. Inside, you’ll see two options: Blog Writer and Easy Blog Writer. Let’s look at the difference between these two one by one.
- Blog Writer
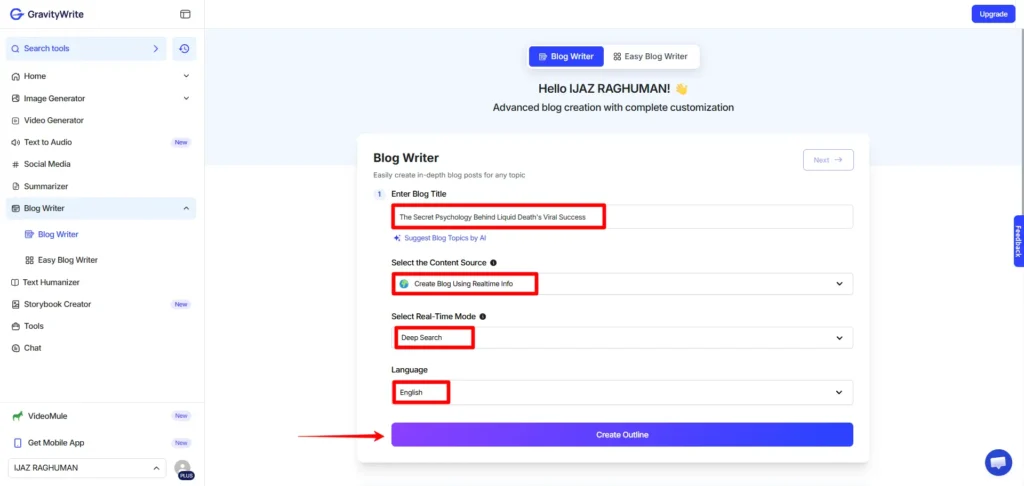
First, enter your blog title. If it’s not strong enough, you can use AI to generate topic ideas and choose one from the suggestions. Next, select the Content Source. You can generate the blog using AI, real-time information or a blog URL if you want the content based on that page.
Here, I’m using Real-time Info. It has two options: Regular and Deep Search. I selected Deep Search.
Then choose the language and click Create Outline. The tool will generate the outline as shown in the image below.
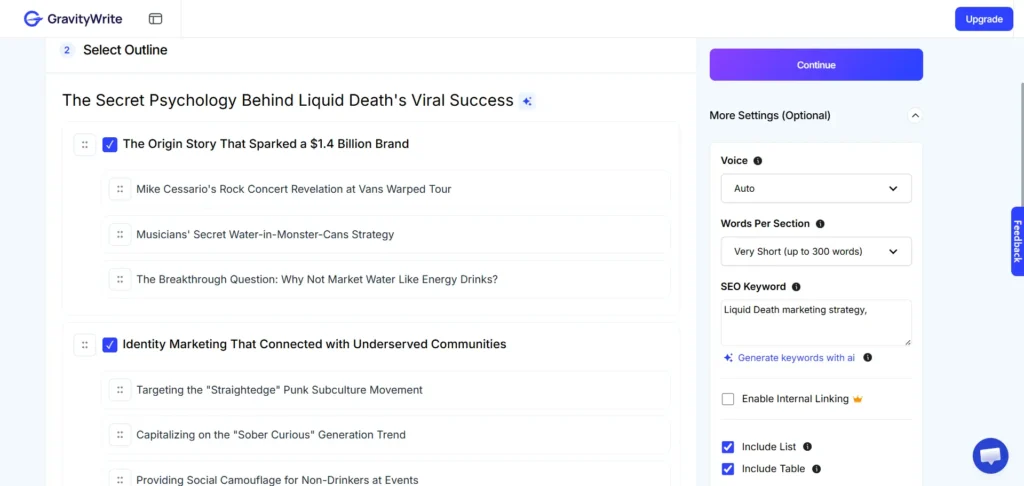
You can edit the outline by deleting headings you don’t need or adding new ones. You can also set the content length for each section.
On the right, the More Settings option lets you customize the blog. You can choose the voice tone, set word count per section and add or generate primary and secondary keywords. You can also add internal links, but this is available only in the Pro plan.
You can also enable lists, tables and AI images and choose the image quality. After setting everything, click Continue to open the next page.
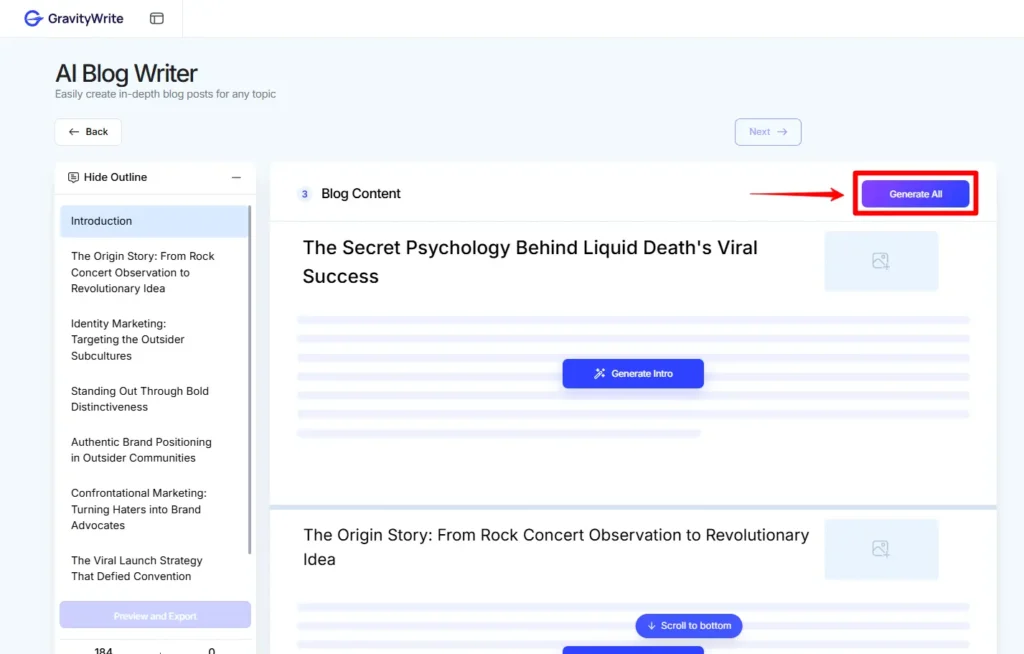
Click Generate All to create the entire blog in a few minutes. When a section is ready, a green tick appears next to the outline on the left. The tool generates content and images together, so you don’t need separate prompts like in ChatGPT or Google Gemini. If needed, you can regenerate the text or image. You can also click an image to edit the prompt or add your own.
However, the image generation needs improvement. Some results had spelling errors and didn’t match the prompt well. When I tested the same prompt in ChatGPT and Gemini, ChatGPT’s image was acceptable, but Gemini’s result was more accurate.
The tool also shows the total word count and image count. At the end, you can preview the blog or export it.
You can download the blog with images as a PDF or publish it directly to WordPress. Check the tutorial in the screenshot before exporting to WordPress.
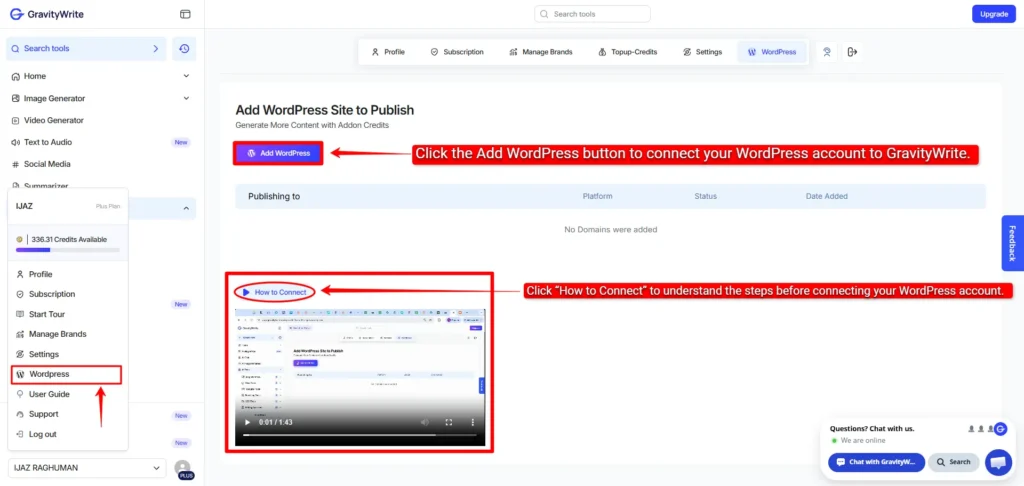
Once your WordPress account is connected to GravityWrite, you can click Export to WordPress and choose whether you want to publish it immediately, save it as a draft or schedule it for later.
Once you publish it, the blog will be published in a few minutes and a link will be generated. You can copy that link and open it to check your blog.
Live screen recording of generating a blog using the GravityWrite AI Blog Writer.
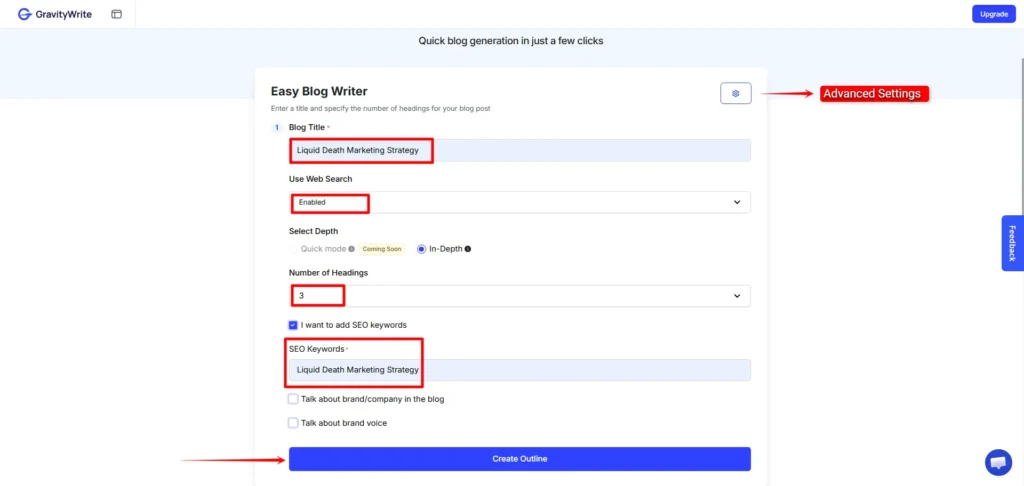
- Easy Blog Writer
The name itself says Easy Blog Writer, so I think this method is simpler than the first one. Just fill in the sections marked in the image below and click the Create Outline button.
Once the outline is ready, click Continue. In a few minutes, the full blog will be generated with relevant images. You can then download the output as a PDF, DOC or TXT file, or export it directly to WordPress.
You can easily edit the content, but there is no option to regenerate the images. So in my opinion, the first method is better because it allows more customization when generating the blog.
3. Simplified
Simplified AI is an all-in-one AI content creation platform that helps users write blog posts, generate marketing copy, create social media content, design visuals, edit videos and manage workflows from a single dashboard. It’s mainly popular among bloggers, marketers, freelancers, and small teams because of its beginner-friendly interface and built-in AI writing tools.
When you first login they give 1000 free credits. You can try the tool for free until those credits finish. I am also sharing the page that opens when you click AI Blog Writer.
You cannot change the tone creativity level or language in the free version. Those options are only available for paid users.
First you need to choose a topic and enter it. Then the tool will show two blog outlines. You can edit them based on what you need and continue. After entering your primary and secondary keywords the blog will be ready in a few minutes.
You can easily edit the blog later, add images add paragraphs, insert links, set a cover image and finally export it as a DOC or PDF file based on your needs.
Another useful thing is they already provide keyword shortcut suggestions on the side. So even a completely new user can use those shortcuts and work faster.
You can also connect and publish directly to Shopify or WordPress.
Only one thing I personally felt missing was AI image generation inside the tool. They provide templates and image upload options but not proper built in AI image generation like some other AI tools.
Screen recording of writing a blog using simplified ai blog writer
Can Google Detect AI-Written Blogs?
This is one of the biggest questions bloggers have right now. The simple answer is that Google does not ban content just because it was written using AI. What actually matters is the quality, usefulness, originality and accuracy of the content. If an AI-generated blog is helpful, well-edited and written for real people, it can still rank well in search results.
The real problem starts when people publish low-quality AI content without editing it properly. Thin articles, repetitive paragraphs, keyword stuffing and inaccurate information can hurt rankings over time. That’s why successful creators usually combine AI writing with human editing, fact-checking and specialized AI detection tools to improve trust and content quality.
How to Make AI Content Sound More Human?
AI-generated content often sounds robotic because many people use simple prompts and publish the output without improving it. The best way to make AI writing sound more human is by editing the tone, adding personal insights, simplifying sentences and making the content feel conversational instead of overly formal.
Many writers also rewrite introductions, add real examples and remove repetitive phrases that AI tools commonly generate. Small changes like adding emotions, opinions, storytelling and natural transitions can make a huge difference. Today, many creators also use dedicated AI humanizer tools to make AI-generated text sound more natural and authentic.
Can AI Writers Replace Human Writers?
AI writing tools are becoming extremely powerful, but they still cannot fully replace human writers. AI is excellent for speeding up research, generating ideas, creating outlines and writing first drafts quickly. However, human creativity, emotions, storytelling, experience and critical thinking still play a major role in high-quality content.
The future will likely be a combination of both. Writers who understand how to work with AI tools can produce content faster and more efficiently, while still keeping the originality and human touch that readers trust. Instead of replacing writers completely, AI is changing how modern content creation works.
Common Mistakes People Make With AI Blog Writing
One of the most common mistakes people make is copying AI-generated content directly without editing it. This usually leads to robotic writing, repetitive wording, weak introductions and generic information that does not provide real value to readers.
Another major mistake is using poor prompts. The quality of AI output heavily depends on the instructions you give. Many beginners also forget to fact-check AI responses, which can sometimes include outdated or incorrect information. Privacy is another growing concern because many users don’t realize how some AI platforms collect and store prompts. That’s why creators and businesses are increasingly exploring more privacy-focused AI tools for safer workflows and better control over their data.
FAQs
1. Are AI blog writing tools good for SEO?
Yes, but only if used correctly. As mentioned in your blog, AI should be used as a base. Adding your own experience and human touch is what actually helps content rank better.
2. Can I publish blogs directly from these tools?
Yes. GravityWrite allows direct publishing to WordPress, including scheduling and drafts, which makes the workflow much faster.
3. Is Bloggr.ai completely free?
No. Only Gemini 2.5 Flash is available for free. Other models and advanced features are part of the paid plan.
4. Do these tools generate images along with content?
Yes. Both Bloggr.ai and GravityWrite can generate images, but based on your experience, GravityWrite’s image quality may need improvement.
5. Which tool is better for beginners?
Bloggr.ai is more beginner-friendly because it offers an all-in-one experience with easy setup, editing, and built-in features.
6. Do I still need tools like Google Docs or Canva?
Not really. Bloggr.ai already includes content editing, image generation, tables and embedding options, so everything can be done in one place.
7. What is the difference between Blog Writer and Easy Blog Writer in GravityWrite?
Blog Writer offers more control and customization, while Easy Blog Writer is faster and simpler but with fewer features.
8. What is an AI blog writer?
An AI blog writer is a tool that helps you create blog content using artificial intelligence. You can give a topic, keywords, or a prompt, and it generates structured content like headings, paragraphs and ideas, which you can edit and refine based on your needs. Using an AI blog writer, you can easily create blog posts quickly and save time.
Conclusion
If you want the best overall AI blog writing experience with advanced customization, built-in editing tools, AI image support, keyword research and a smoother workflow, then Blogger AI and GravityWrite clearly stand out as the stronger options in this list.
Especially for serious bloggers, content creators, and marketers who want better control over blog structure, visuals, SEO and content quality, those two tools feel more complete and practical for long-term usage.
At the same time, Simplified is still a good option for beginners because they provide 1000 free credits to test the platform before paying. That makes it easy for new users to explore AI blog generation without spending money initially.
However, compared to Blogger AI and GravityWrite, Simplified currently feels more limited in customization and lacks proper built-in AI image generation features. So for advanced blogging workflows, the first two tools still feel like the better overall choice


0 Comments