

We tested Reve AI ourselves and are sharing our honest review based on real experience.
I written this blog just because I got the chance to use this tool very personally for different purpose.
Honestly, this is not a sponsored post. First, This review is based on hands-on testing of the Reve AI tool. You can access the platform using the link provided below.
Reve AI UI Update 2026
The 2026 UI update gives Reve a cleaner, single-panel layout where everything is easier to access. Instead of juggling menus, you can now focus directly on the canvas and edit elements more intuitively.
One downside I noticed is that earlier I could easily upload another image while editing just by dragging and dropping it. With the new update, that option doesn’t seem to be available anymore, which makes the workflow slightly less convenient.
After you sign in, the page will look like the one shown below.
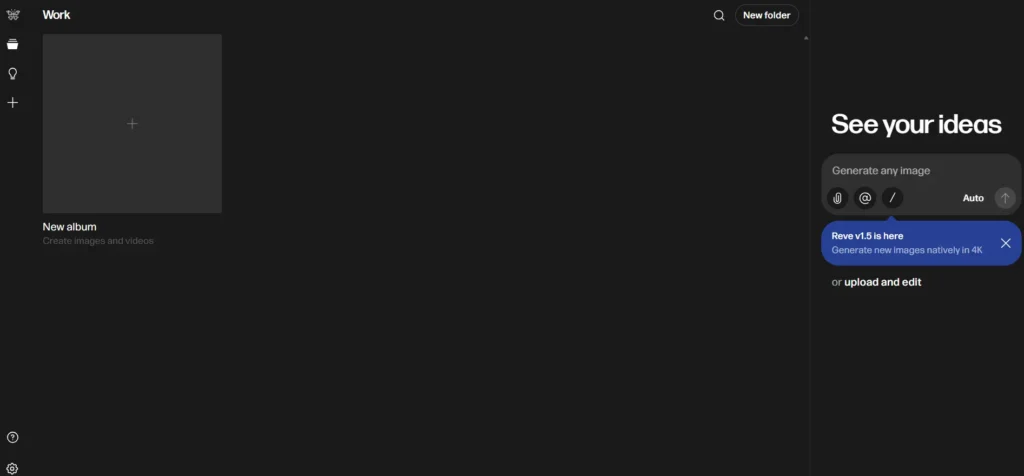
Table of Contents
Revi AI Image Generator Review – Quick video
Quick overview of reve (features & capabilities)
| Feature | What It Does | How It Helps You | Who Can Use It |
|---|---|---|---|
| AI Image Generation | Creates images from text prompts | Turns your ideas into visuals in seconds | All Users |
| @ Numbering | Combines multiple uploaded images | Gives precise control over where objects appear | All Users |
| Instruct | Let’s you edit using text commands | Makes quick and repeated edits easy | All Users |
| Vary | Creates different versions of the same image | Helps you explore multiple creative options | All Users |
| Upscale | Increases image resolution | Makes images ready for high-quality or print use | All Users |
| Effects | Adds visual styles like textures, lighting, and colors | Enhances the look and mood of your images | All Users |
| BG Remover | Removes the background from images | Makes design work faster and cleaner | All Users |
| Video (Veo) | Turns images into short videos | Creates cinematic 8-second video clips | Pro Users |
Reve Basic Options and How to Use Them
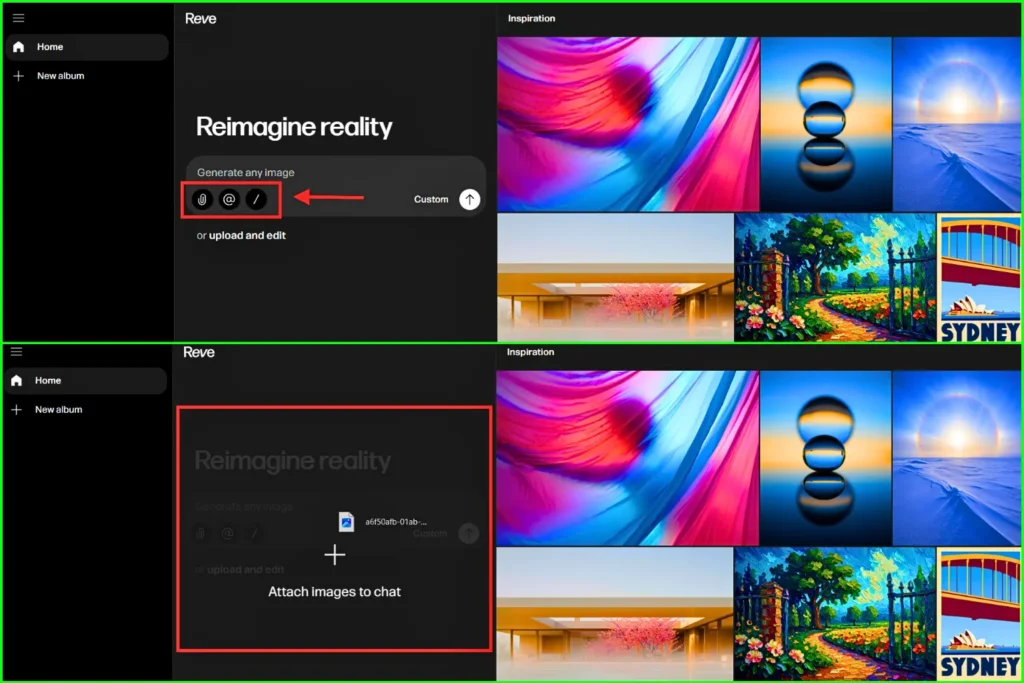
Attach Option📎: With this option, you can upload images from your files. Previously uploaded images stay saved and can be reattached easily. If needed, you can also use the Take a Photo option.
Drag & Drop : The second upload method is simple drag and drop. Just drag your image into the area shown in the image above, and you can upload it easily.
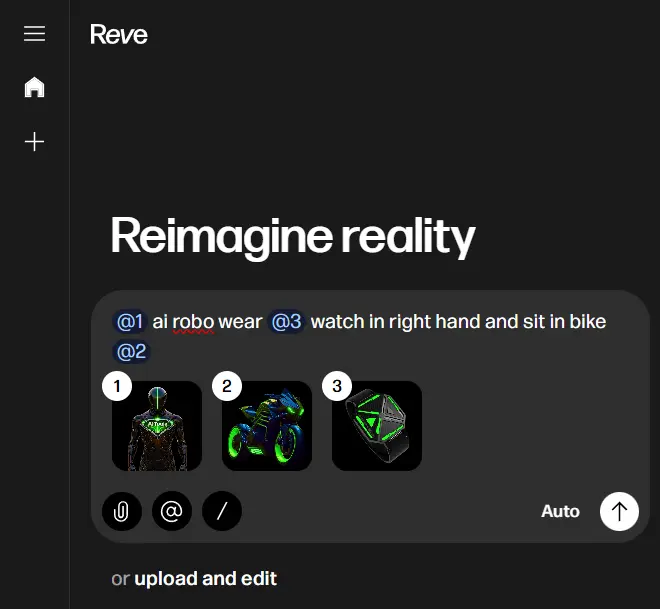
Reference Option @ : When you upload multiple images, Reve numbers them as 1, 2, 3. Use @1, @2 in the prompt to clearly refer to each image..
Forward Slash / : When you type a slash, four tool options will appear. You can click the one you need and start using it.
Reve AI offers multiple generation modes depending on whether you want static visuals or motion-based content.
- Image – Generate an image from a text prompt or a reference image.
- 1.5 Preview – Use Reve’s latest preview model to generate higher-quality, more photorealistic images with improved detail, lighting accuracy and sharper textures.
- Video from Frames – Create a video by animating selected image frames.
- Video from Reference – Generate a video based on an uploaded image as a visual reference.
- Video from Prompt – Create a video directly from a text description without using any images.
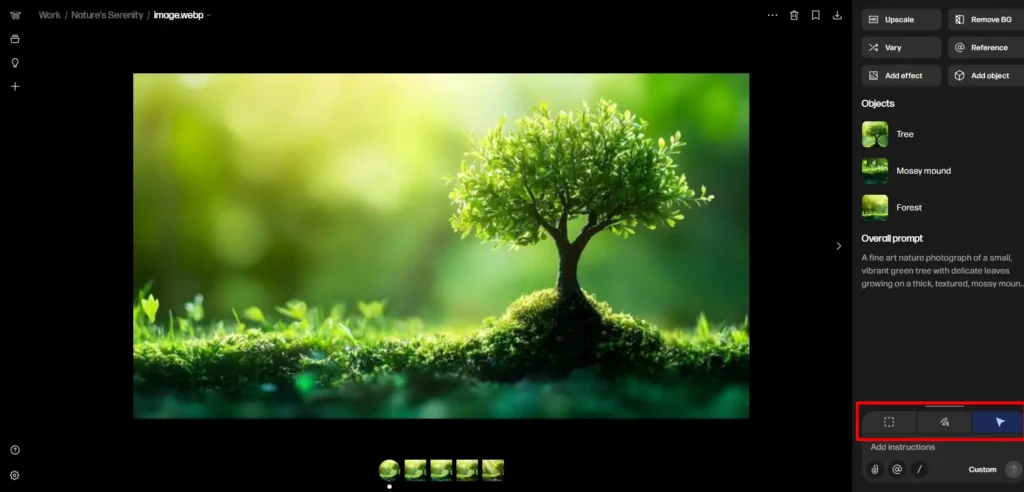
Spotlight: Use this option to select an area in the image and apply changes with a prompt.
Draw: Manually brush/draw over parts of the image you want to modify.
Select Objects: Automatically detects and lets you select specific objects in the image to edit or modify.
Important Note: Free users can only generate images. The other three video options are available only for paid users.
If you want to generate videos for free every day, check this detailed blog on the best AI video generators, you’ll get a clear idea on how to do it.
Reve Image Generation Preferences (Control Panel)
In Reve, there is a default option called Auto. When you click it, the image generation preferences will appear, as shown in the image below.
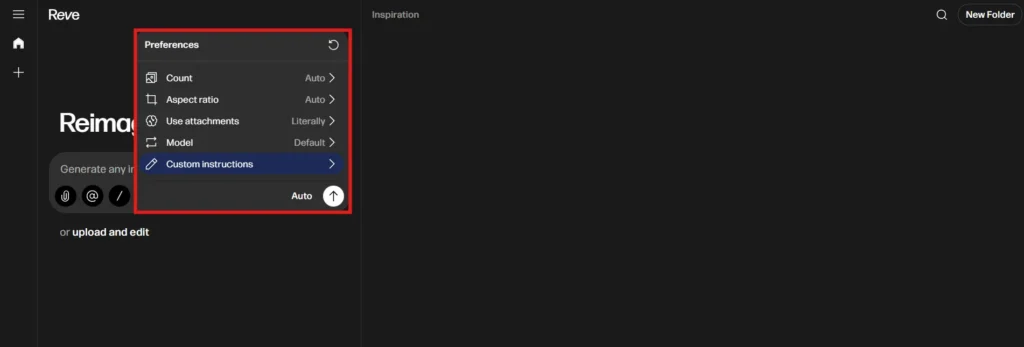
Count – Before generating an image, set the count first. You can generate one, two, four or eight images in a single click.
Aspect ration – You can set the image aspect ratio based on your needs, such as 16:9, 3:2, 4:3, 1:1, 3:4, 2:3, and 9:16.
Use Attachments – It tells Reve how to treat your uploaded image. It have two options.
First option is Literally – It edits the image closely without changing the layout.
Second option is Inspiration – it uses the image as an idea and creates new variations.
Model – It decides how Reve generates your image. It have two models.
First option is Default – It gives balanced quality and is best for normal use.
Second option is fast – quicker and useful for previews or quick testing.
Custom Instructions – It let you set permanent rules for how Reve creates images. You can define things like colors, style or branding once instead of repeating it. This saves time and keeps your images consistent every time.
Reve Image Generation Preferences (Control Panel) Demo Video
Combine All Images into One
I selected three images. One is an AI robot, the second is a futuristic bike and the third is a watch. I uploaded all three images in Reve and gave a prompt asking for the AI robot to wear the watch on its right hand and sit on the bike. One important thing is that Reve automatically assigns numbers like one, two and three to the images you upload. We have to mention those numbers correctly in the prompt before pressing enter.
Nice, just like we expected, it combined all three images and gave the output. It actually looks good. Lets see the output image below.
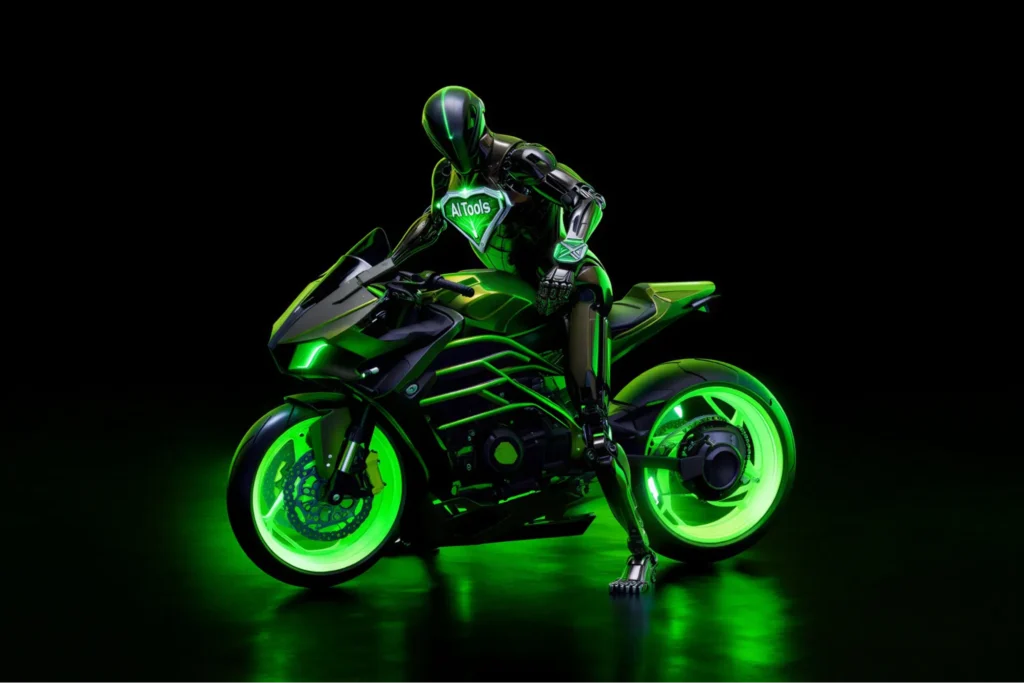
Honestly, it generated four images in just a few seconds in a single attempt, but only this one came out well. The other three were not that good. But you can regenerate them or improve the prompt and try again.
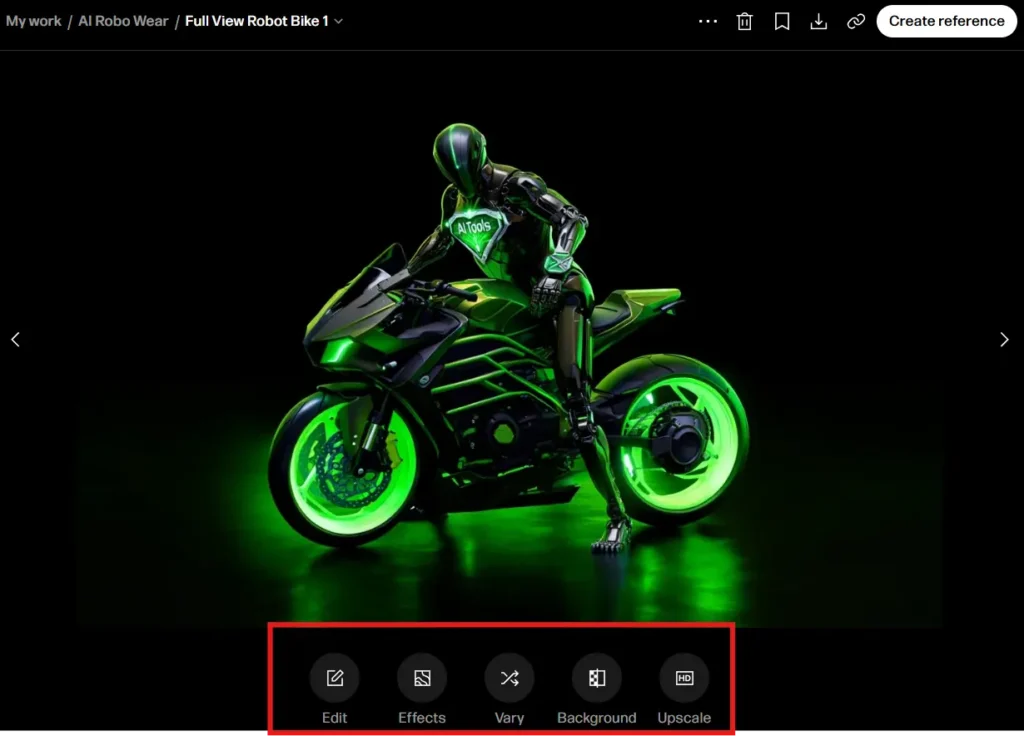
You can edit the generated image easily. Add effects if needed, remove the background and upscale it within seconds.
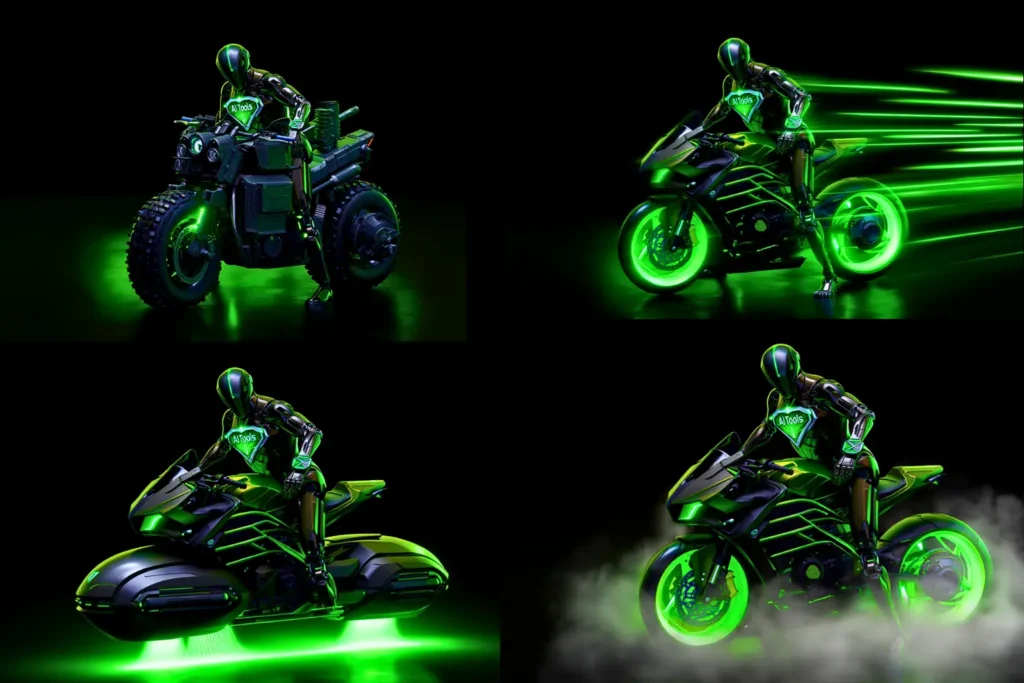
Use Vary Option to Explore Different Variation of Images
If you click the Vary option, Reve will generate different outputs. I will show them below.
The images generated by Reve already look great. Just imagine how good they would look if we animated them. Sounds interesting, right? Let’s try it out. I’ve attached it below.
Image Animation using Grok imagine
If you’re also interested in animating images like this, don’t worry, I’ll tell you how. You can take the images you generated and use Grok Imagine to animate them. I’ve already written a detailed Grok image and animation review. Feel free to check. It will give you a clear idea of how it works.
Background Remover Free
Let’s check the background remover option in Reve. To be honest, I’m currently using Reve to remove backgrounds because it’s free and quickly removes the background from any image easily.
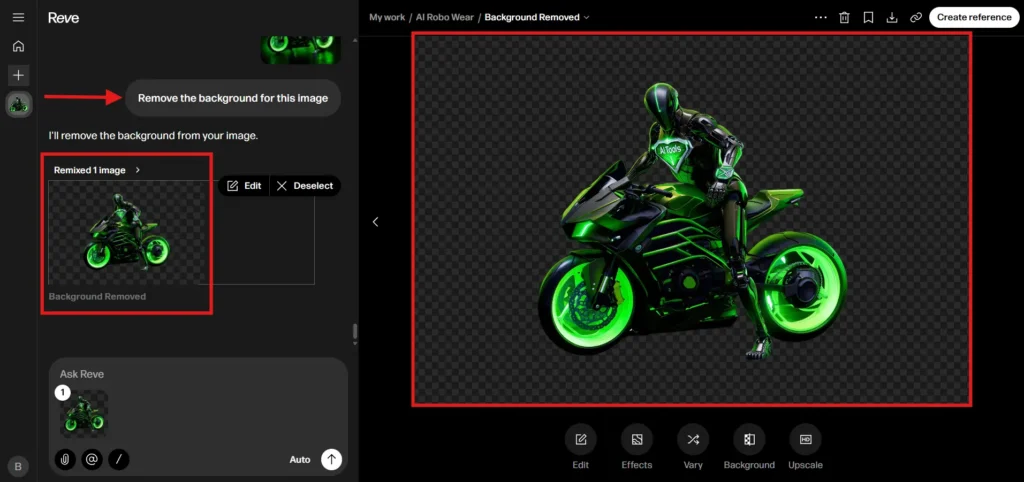
The background was removed perfectly, and we can download it easily.
If background editing is your main use case, you can also explore our detailed testing the best ai background remover and changer tools available today.
Edit Image With AI
You can easily make detailed edits to images.
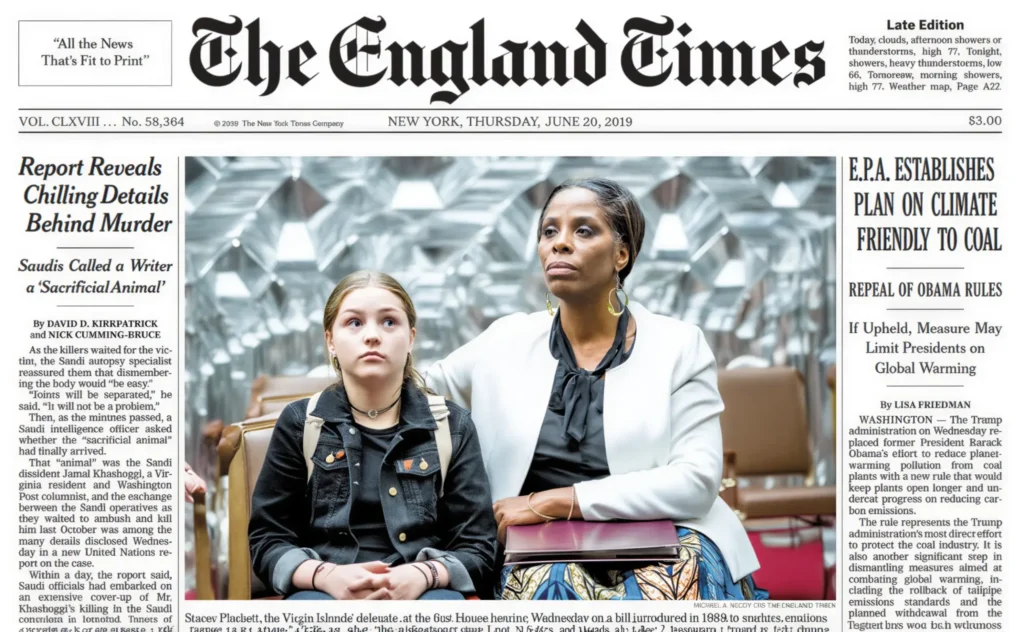
I taken below image in google for testing purpose
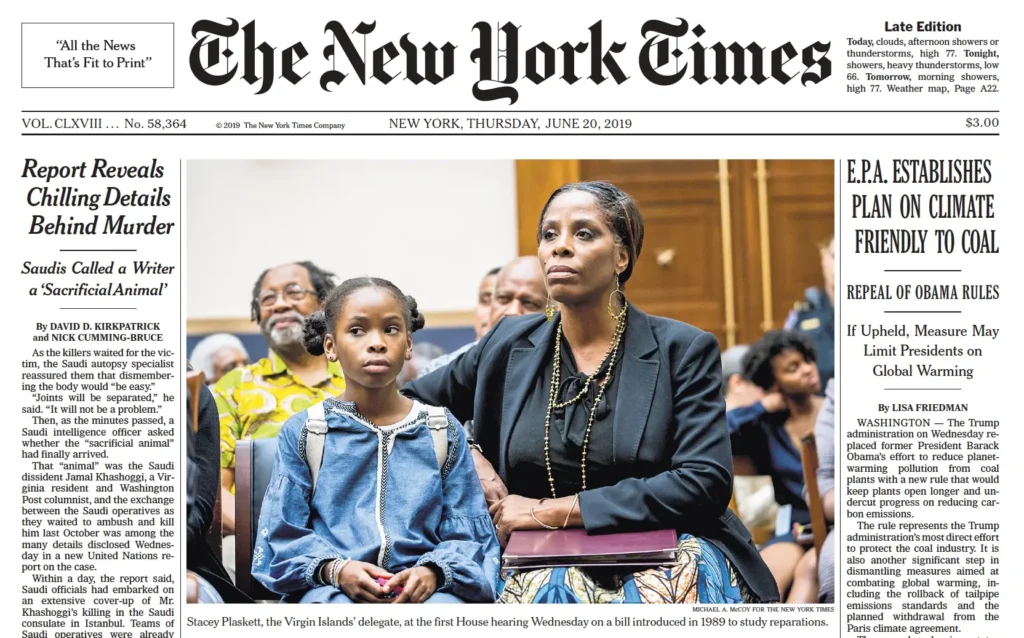
In the image above, We changed the newspaper title from The New York Times to The England Times. I also completely changed the little girl, modified the old lady’s outfit, and updated the seats and background. Let’s look at the result below.
If you are not sure how to edit like this, or if you want to see how we did these edits step by step, we’ve attached a video below. It will give you a clear idea of how you can make similar edits.
Live Image Editing Using Reve AI Edit Option
Disclaimer: In the AI era, trusting what we see online is becoming difficult, as appearances can be deceptive! So lets checks the tool privacy before you use try this page to learn how to choose privacy-focused AI tools.
Add Effects In Image
While generating images, you will see an Effects option below. This section has three types of effects.
Textures – Includes 13 texture effects.
Light – Includes 16 lighting effects.
Color – Includes 22 color effects.
I’ve added a short video below that gives a quick overview of each effect one by one, so you can watch it and clearly see how they look.
Add Effects in Image Using Reve AI
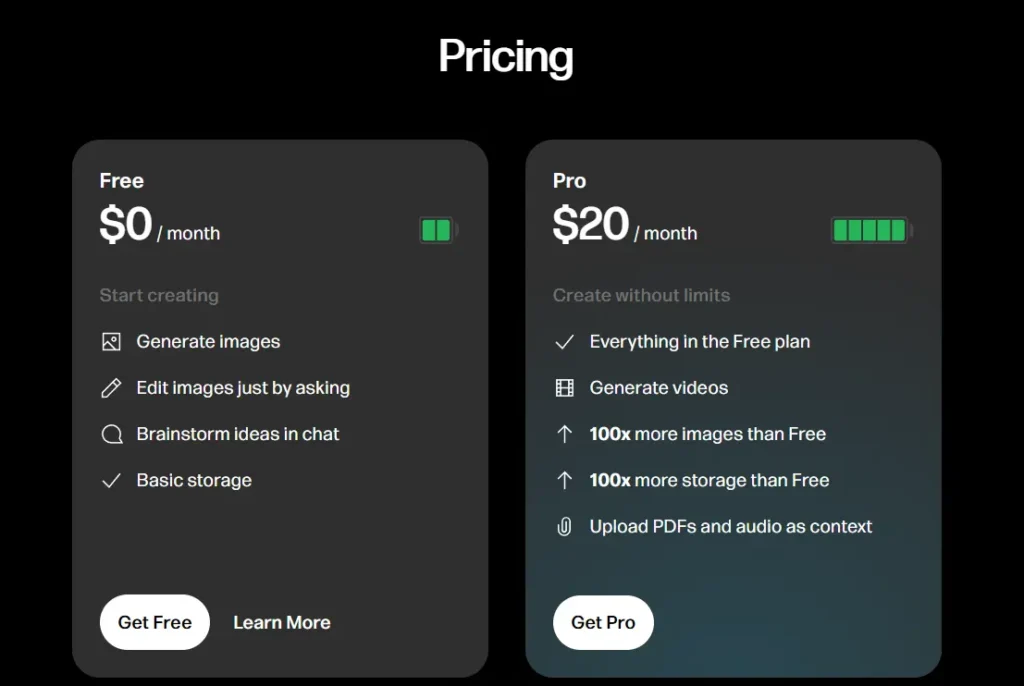
Pricing Page
In our opinion, if you only want to generate and edit images, the free plan is more than enough. But if you want to create videos, it’s better to choose the Pro plan and start creating without limits.
FAQ’s
1. Why am I having trouble signing in?
Most login issues happen because of “Single Sign-On.” If you signed up with Google or Apple, you have to use that same button every time. Also, check if you’re in a restricted region—Reve is currently unavailable in countries like China, Russia, and Iran.
2. Is my content used to train the AI?
Content from Free users may be used to improve the models. Pro users have the option to “opt-out” of training in their account settings, ensuring their creative work remains private.
3. Can I cancel my subscription and get a refund?
You can cancel anytime through your settings, and your account will remain active until the end of your current month. However, Reve does not offer refunds for unused time or recurring charges, so it’s best to cancel before your renewal date if you’re finished.
4. How do credits or “energy” work?
Each generation costs a certain amount of energy. Free users get a daily refill, while Pro users have a much larger monthly allowance. If you run out, you can buy “Booster Packs” that never expire.
5. Can I create videos on Reve?
Yes, Pro users have access to video generation powered by Veo. You can use your generated images as starting or reference frames to create cinematic 8-second clips.
6. How good is Reve at rendering text?
It’s currently a market leader in typography. Unlike many models that produce gibberish, Reve can accurately render specific text on signs, shirts, and newspapers with very few errors.
7. Does Reve AI have a mobile app yet?
As of 2026, Reve is optimized for mobile web browsers rather than a dedicated standalone app. You can access all features, including generation and editing, by logging into the site on your phone.
8. Is Reve AI free to use in 2026?
Yes, Reve offers a robust Free tier that provides a set amount of “free energy” upon signup. While usage is subject to daily limits after the initial allowance, you can generate and edit a surprising number of images without ever opening your wallet.
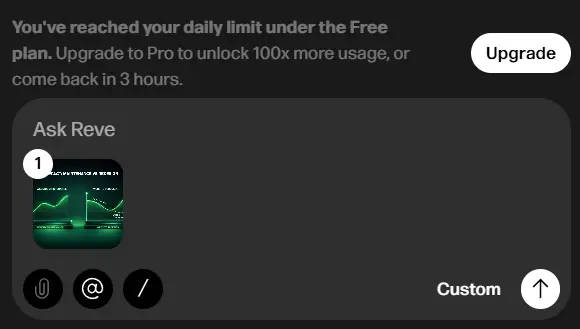
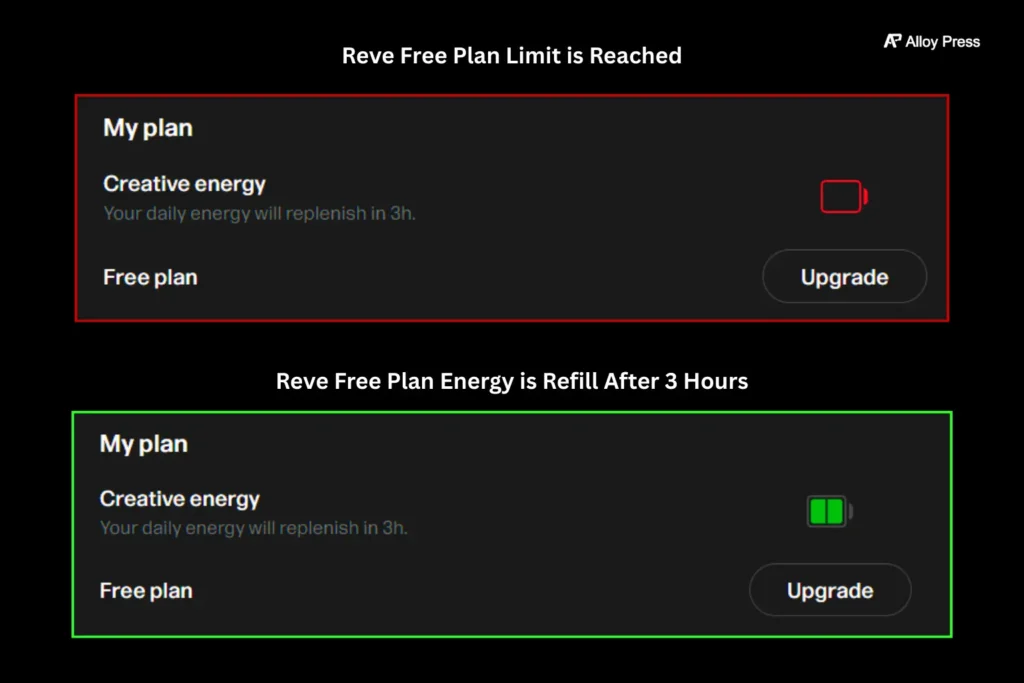
Daily Limit for free Users
If you overuse it, you’ll see an indicator like the one below, access gets limited, and you’re prompted to upgrade to Pro to continue.
Don’t worry about running out of energy in Reve. I found a way for you to create quality images for free every day. If you want to learn more, check this blog – best ai image generator, it has real examples from my own experience and will give you clear ideas.
If you wait for about 3 hours, the drained creative energy refills (as shown in the image below), and you can start using it again.
Final Point
In My opinion, Reve is a very helpful tool because it lets us generate AI images & videos and everything is easy to edit. We can remove backgrounds, upscale image quality and get results in just a few seconds. It saves us time and makes the whole process much simpler. It great choice for those who want to test or play with images for free.
Reve AI seems to be actively improving usability, which is a positive sign for long-term platform development.
Related Reading
Manus AI Review 2026: What You Should Know Before Trying It
Kling AI Review: I Tested It in Detail, Here Is the Honest Truth
Grok AI Review (Tested Image & Video Generation deeply)

0 Comments