What Is an AI Video Editor?
An AI video editor is a tool that edits your footage based on plain-language instructions instead of manual timeline work. You describe what you want, such as removing the background, adding captions or cutting silences and the AI handles it. The result is professional-looking video in a fraction of the usual time, even if you have no editing skills.
How We Tested
We tested all four tools using the same raw video and editing prompt. We compared their final videos against 18 requirements, checking background removal, captions, effects, cuts, playback, and export quality. Each requirement scored 1 for Pass, 0.5 for Partial, or 0 for Fail. Results reflect our specific test and may vary across setups.
Quick Comparison
Tool | Model & Plan | Editing Time | Prompt Accuracy | Output Quality | Best For |
|---|---|---|---|---|---|
Claude | Opus 5.5 (Medium), Claude Pro + HyperFrames | 18 min (desktop) / 1 hr 40 min (laptop) | Very high | Excellent | Polished, publish-ready edits |
Antigravity | Gemini 3.8 Flash High, Google AI Pro | 1 hr+ at times | ~70% | Decent | Alternative editing workflow |
ChatGPT (Codex) | GPT-5.6 (Medium) + HyperFrames | 10–15 min | Moderate | Less polished | Fast first drafts |
Grok | Grok 4.7 (High), paid plan | 1 hr+ | Not rated | Not rated | Terminal-based editing |
1. Claude
First, we installed Claude and selected the Code option. We saved our raw video in a new folder on our computer.
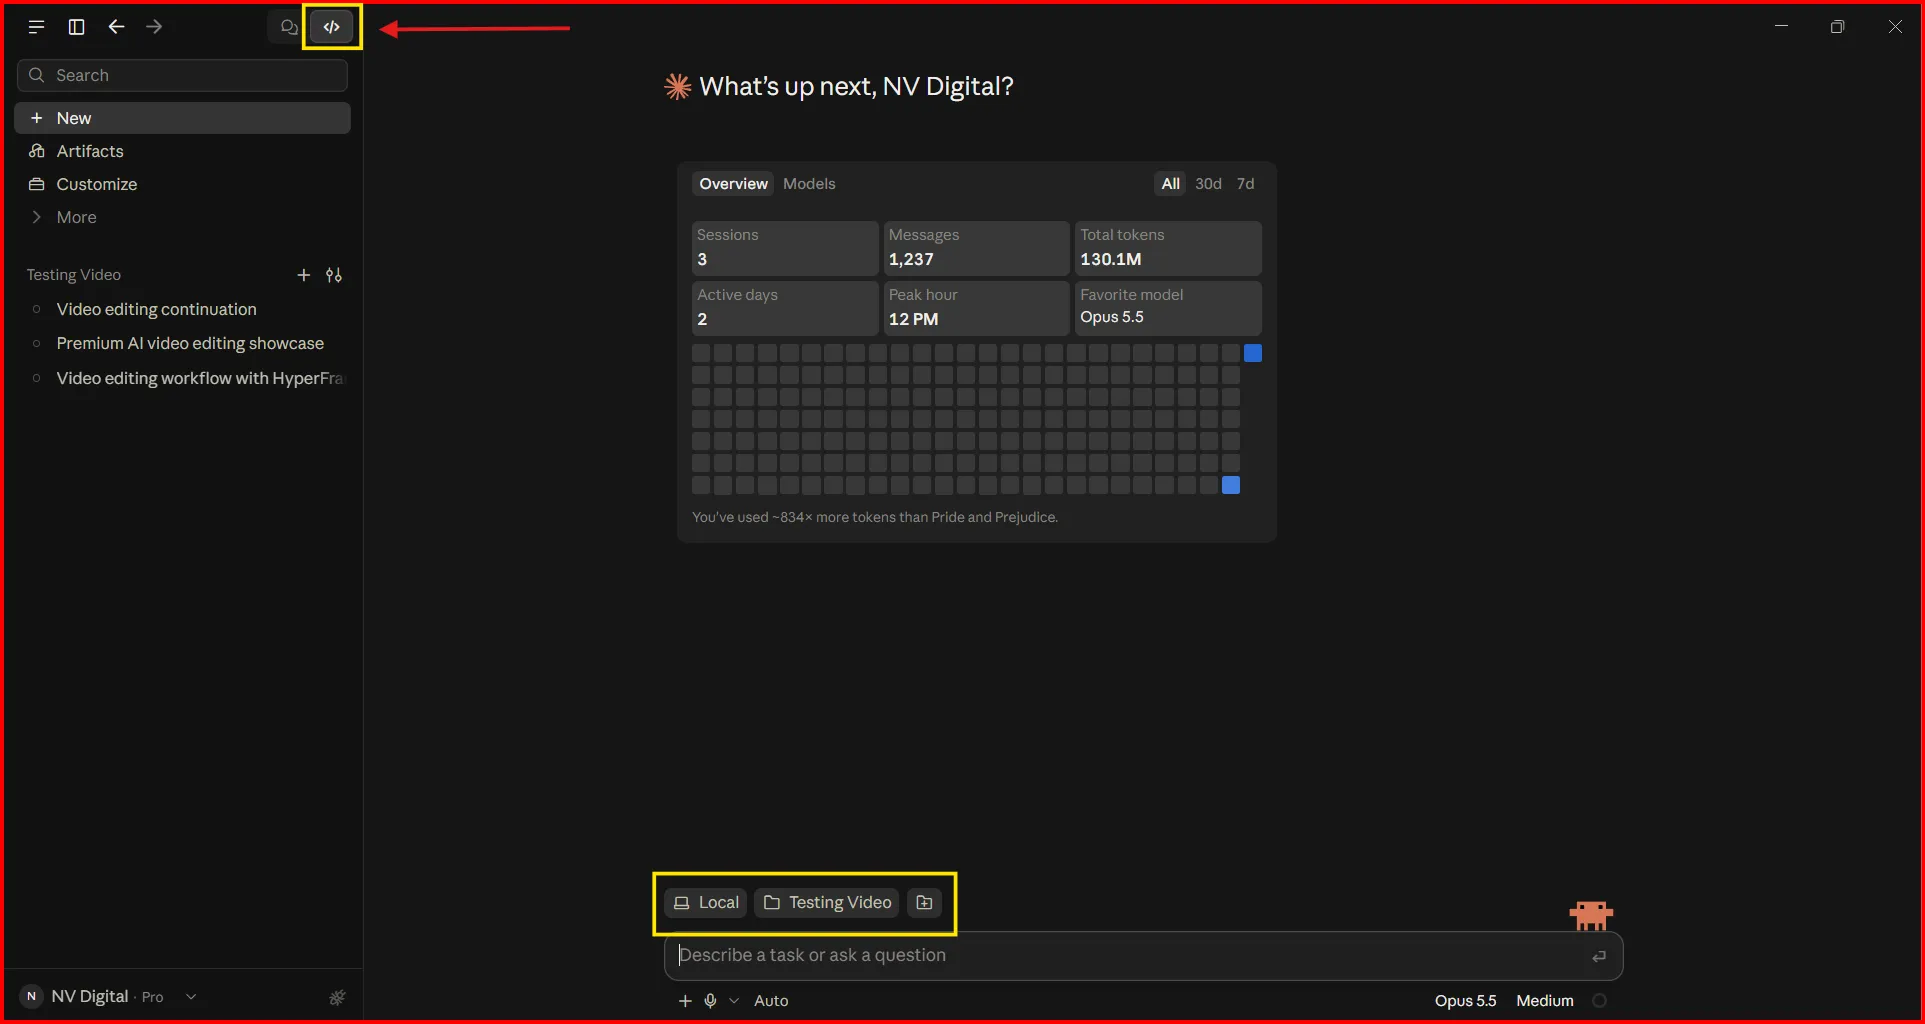
In the screenshot, we marked the option with a yellow box for your reference. We selected the Local option, clicked Add Folder and chose the folder containing our raw video. Then we pasted our prompt and pressed Enter.
We first tested this method on a laptop using Claude. It took around 1 hour and 40 minutes to edit the video and generate the final output. When we checked the usage, it had used 17% of our available usage limit. So, editing a single video used a noticeable amount of Claude's usage.
We then tried the same method on our desktop system using local files. This time, Claude completed the video editing process in just 18 minutes. Compared to our laptop test, the editing process was significantly faster on our desktop. This suggests that system configuration can play an important role in the overall editing time, especially when working with local video files. However, the actual processing time may vary depending on your system configuration, prompt and video complexity.
The output was really good and closely followed our instructions. It removed the green screen and added a background, included the elements we requested and cut unnecessary clips without making mistakes. Overall, we were impressed with the result.
However, the editing time and usage may vary depending on the prompt and the complexity of the video. For our test, we used the Claude Pro plan with the Opus 5.5 model, set the effort level to Medium and installed the HyperFrames by HeyGen connector.
Claude Pros & Cons
Pros
Pro | Why It Matters |
|---|---|
Best output quality | Clean green-screen removal, a well-chosen background and every requested element included |
Highly accurate to the prompt | Closely followed the instructions with no editing mistakes |
Fast on a capable system | Finished in just 18 minutes on a desktop |
Simple setup | Select Local, add the folder, paste the prompt and you’re done |
Works with HyperFrames | The HeyGen connector adds stronger video-editing capability |
Cons
Con | Why It Matters |
|---|---|
Heavy on usage limits | One video used about 17% of the Pro plan’s limit |
Speed depends on hardware | The same task took 1 hr 40 min on a laptop |
Needs a paid plan for serious use | The test was run on Claude Pro |
2. Grok
When we opened Grok Build, we saw two code options: PowerShell and WSL, as shown in the screenshot below.
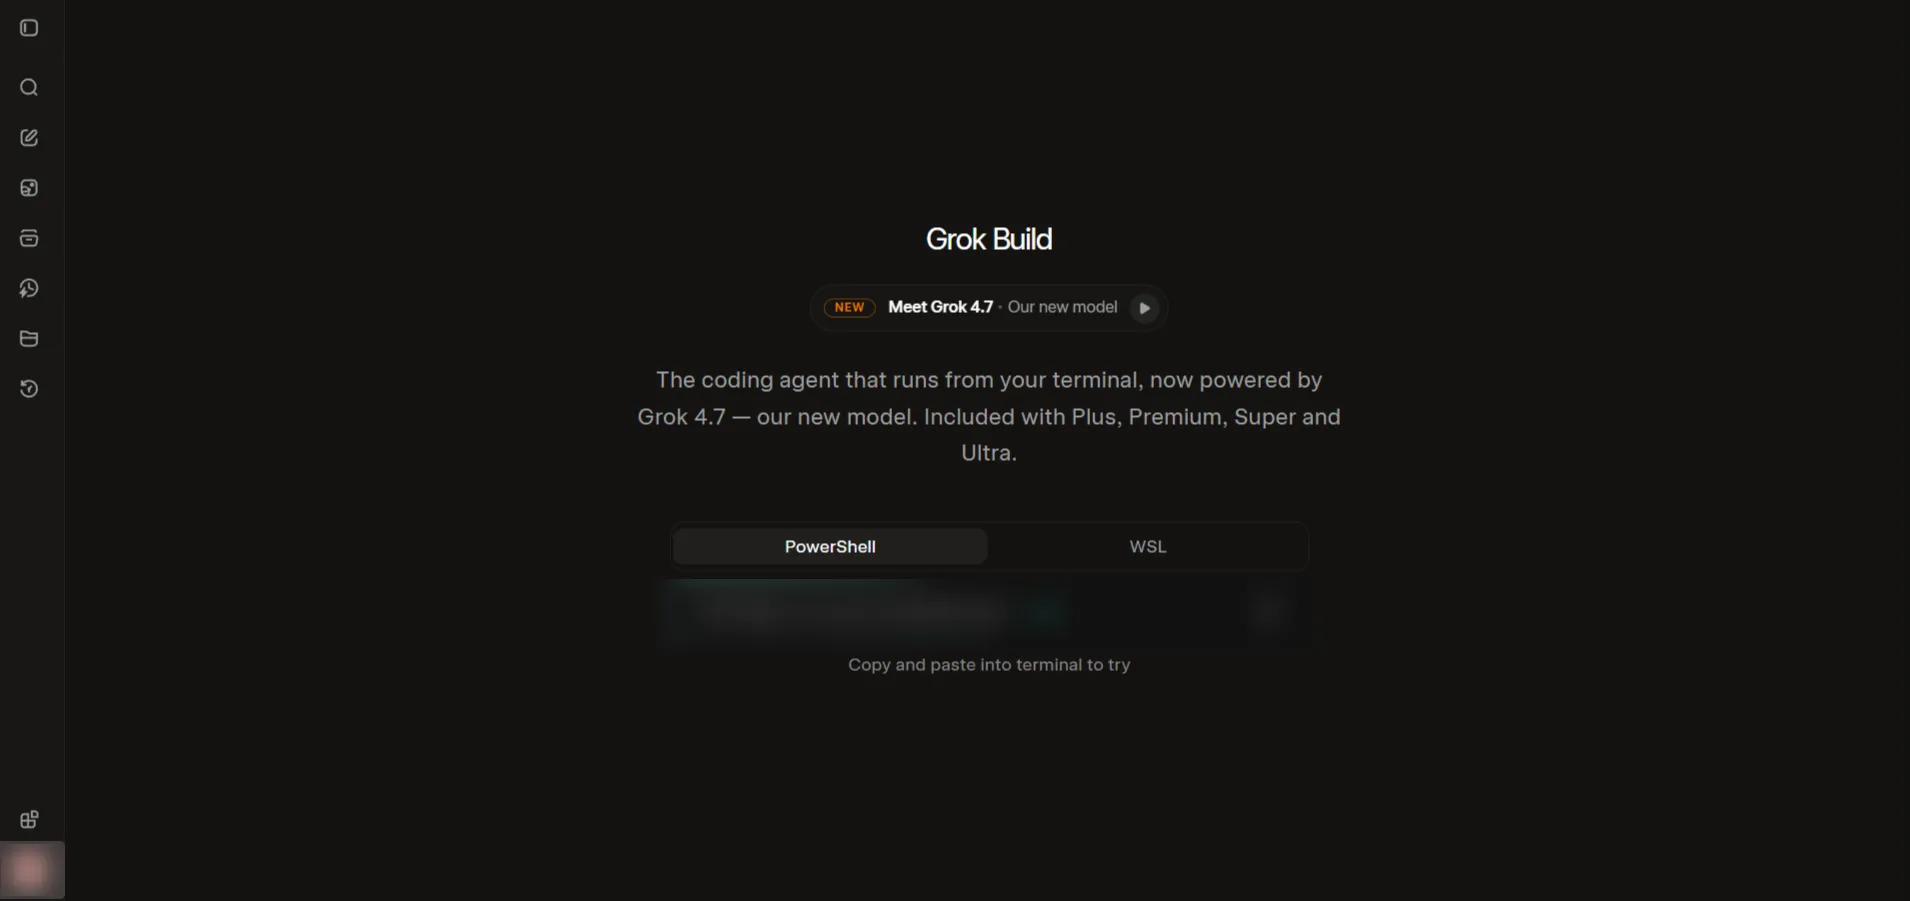
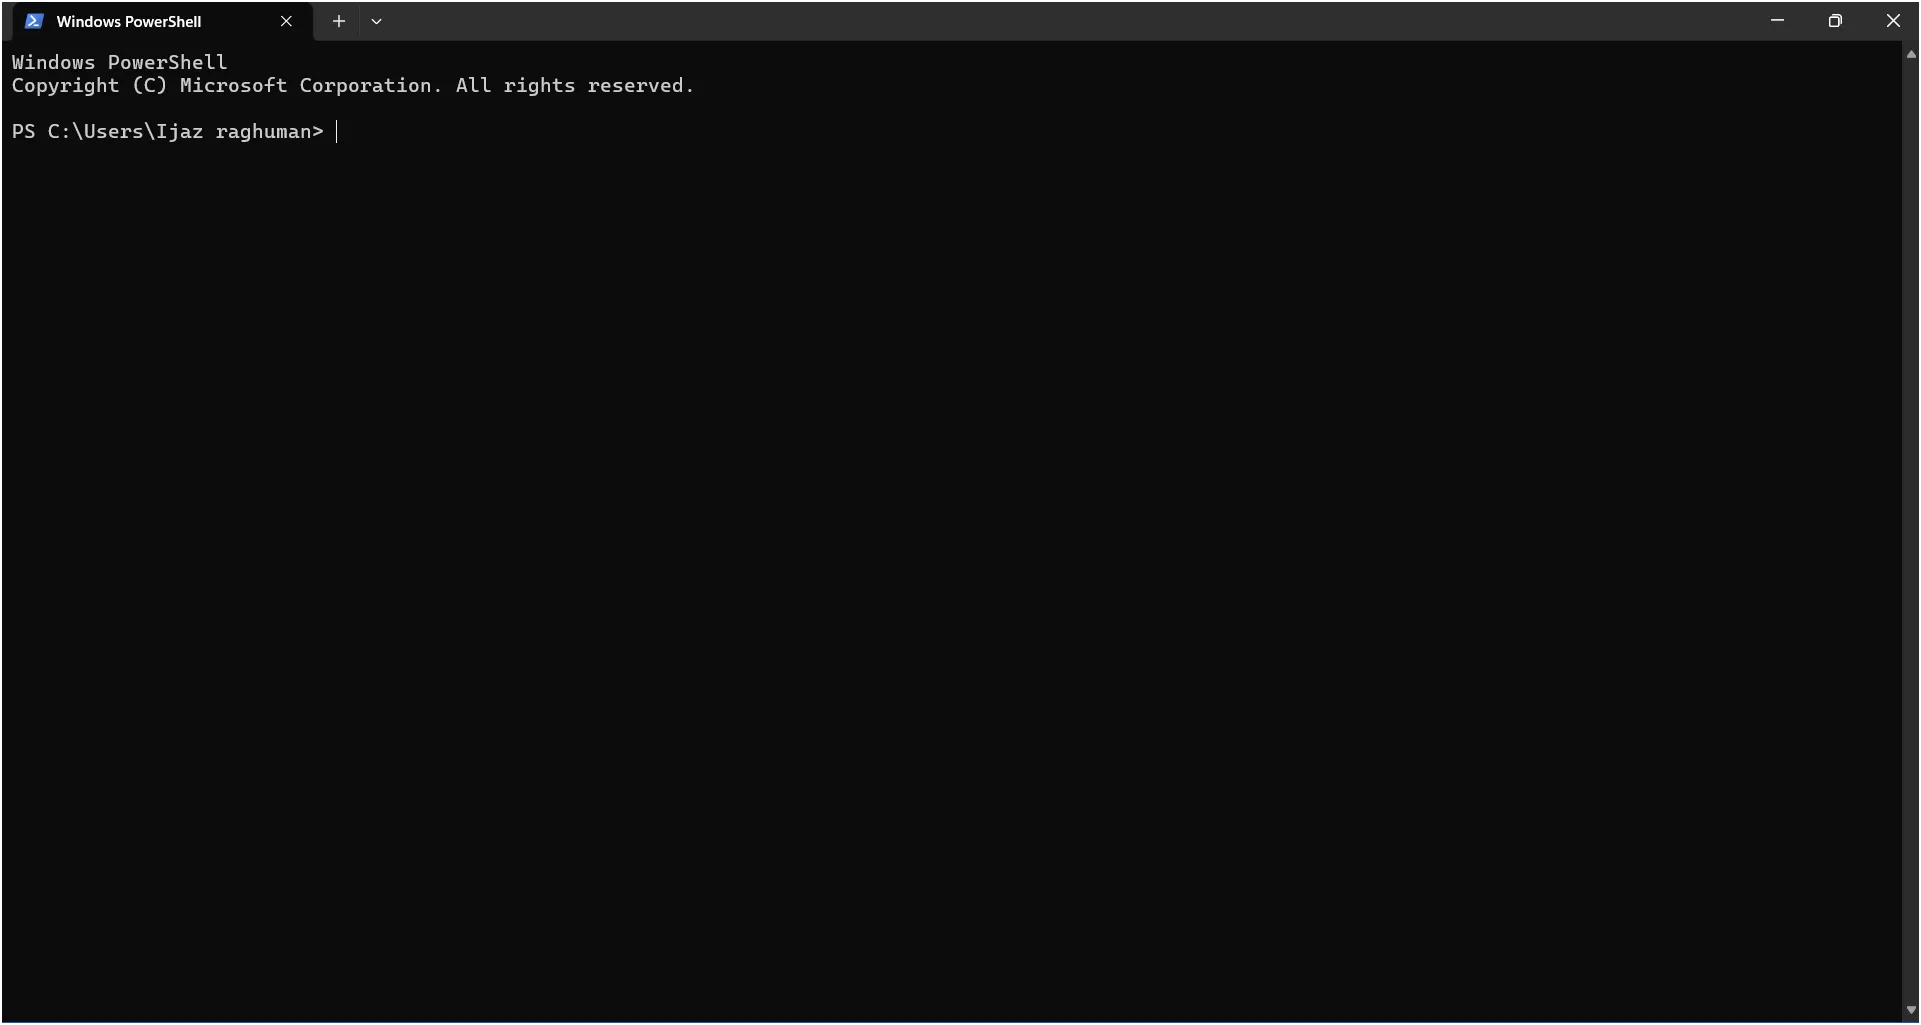
We then opened Windows PowerShell, copied the PowerShell code shown in Grok Build, and pasted it into the terminal. After pressing Enter, Grok was installed successfully. The terminal then prompted us to choose between grok and agent. We typed grok and pressed Enter to launch Grok Build.
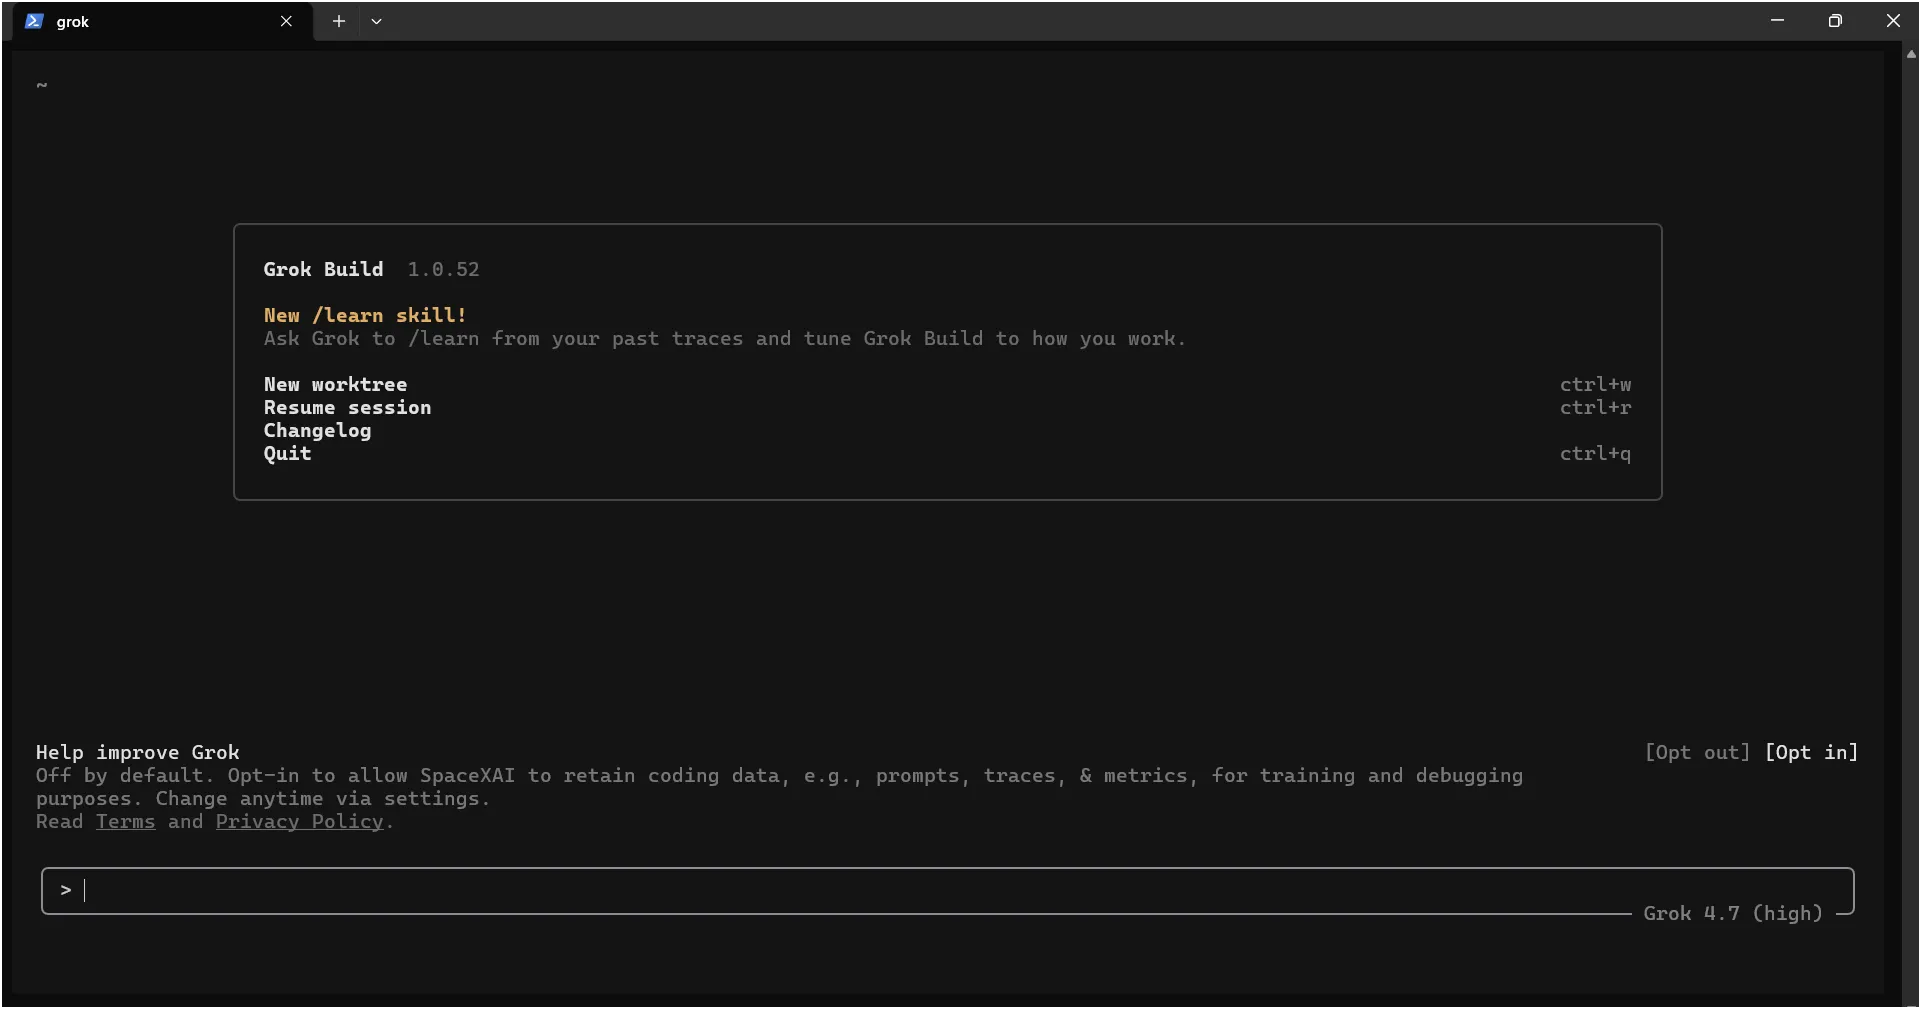
The Grok Build interface will open, as shown in the image below. You'll see a prompt box with the Grok 4.7 model selected. We pasted our prompt into this box and pressed Enter to start the video editing process. Make sure your prompt is clear and detailed, explaining exactly what edits you want, so Grok can understand your requirements and generate a better output.
After pasting the prompt and pressing Enter, Grok asked for permission before performing each action. We had to select “Yes” or “Proceed” to let it continue. The entire process took more than an hour to generate the final video output.
The Grok output had a green tint across the video, which looked like a possible issue with the green-screen removal.
We tested Grok on a paid plan and you can check out the final output below to see how well it followed our instructions.
Grok Pros & Cons
Pros
Pro | Why It Matters |
|---|---|
Quick install | One PowerShell command sets it up |
Terminal-native workflow | Suits developers who live in the command line |
Powered by Grok 4.7 | Runs on xAI’s latest model |
Cons
Con | Why It Matters |
|---|---|
Green tint across the video | The green-screen removal likely wasn’t done cleanly, so the result isn’t publish-ready |
Constant permission prompts | You must approve every single action manually |
Constant permission prompts | You must approve every single action manually |
Slow | Took more than an hour to finish |
Less beginner-friendly | Needs PowerShell or WSL instead of a simple app interface |
3. Antigravity
We installed Antigravity and placed our sample test video in a folder. Then, we selected the project, checked that the Local option was selected, pasted our prompt and pressed Enter.
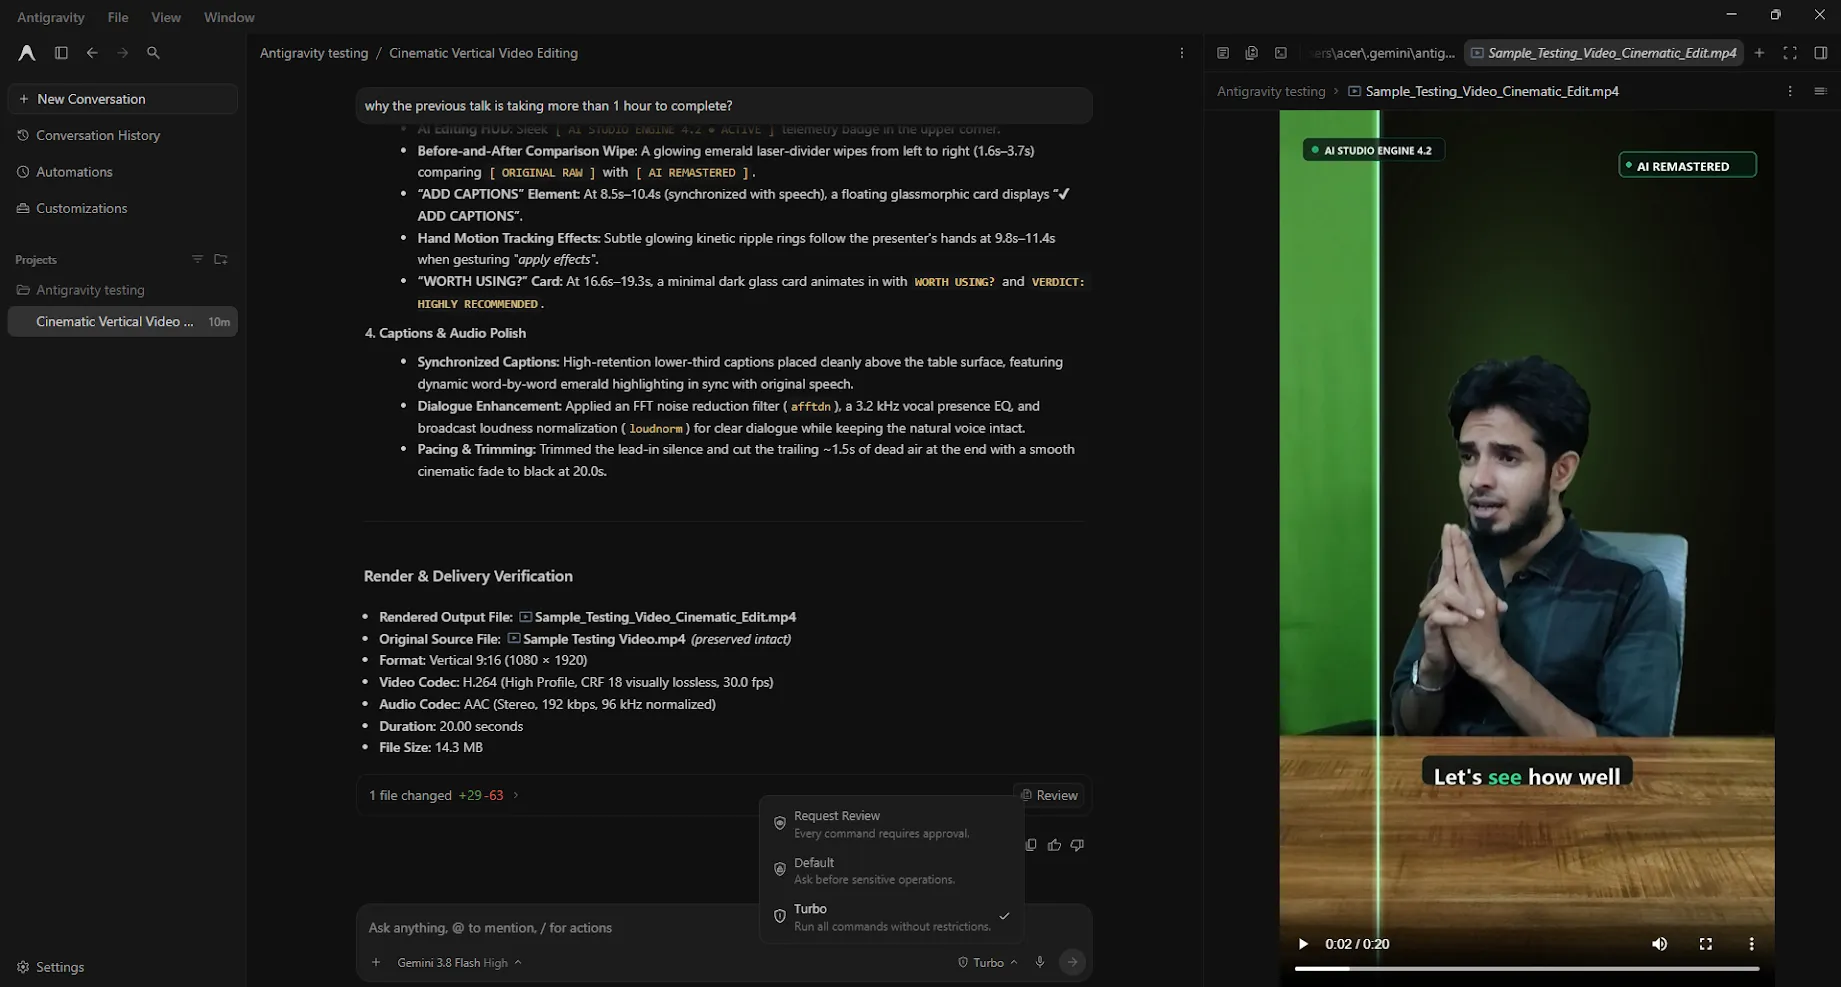
For this test, we used the Gemini 3.8 Flash High model with the Google AI Pro plan and enabled Turbo mode. We enabled Turbo mode because Antigravity frequently asks for permission while performing tasks. With Turbo mode enabled, it can carry out the editing process without repeatedly interrupting us for permission.
When it comes to the output, Antigravity did a decent job, but the results were not as good as Claude's. It followed around 70% of our prompt instructions, but it missed some details in terms of prompt accuracy. There is also a possibility of mistakes during the editing process.
If you analyse the mistakes and provide a clearer, more detailed prompt for another attempt, you may get better results. We also experienced occasional lag during the process, and sometimes the editing took more than an hour to complete. If the output is not generated or the process gets stuck, providing another prompt may help it resume the task and potentially generate the output faster. However, the results and processing time may vary depending on the prompt and system configuration.
Antigravity Pros & Cons
Pros
Pro | Why It Matters |
|---|---|
Decent overall output | A usable result that ranks second in quality |
Follows most instructions | Covered about 70% of the prompt |
Turbo mode for hands-free runs | Edits without constant permission pop-ups |
Recovers with re-prompting | A follow-up prompt can unstick the task and speed it up |
Cons
Con | Why It Matters |
|---|---|
Misses prompt details | Around 30% of the instructions weren’t fully applied |
Can make editing mistakes | You’ll need to review the output carefully |
Occasional lag | Some runs took over an hour |
Can get stuck | Sometimes needs another prompt to finish |
Asks for permission often | Turbo mode is practically required |
4. ChatGPT (Codex)
We installed ChatGPT and selected Codex. First, we placed our raw video in a separate folder. Then, we selected New Project and added the project folder from our computer. Once we clicked Create Project, the folder was added successfully.
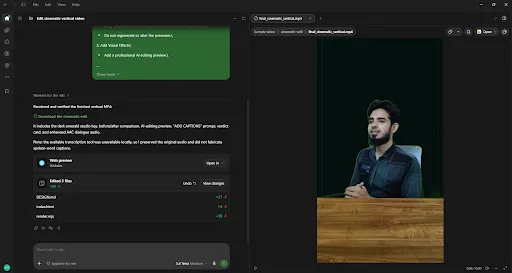
Next, we installed the HyperFrames by HeyGen plugin and approved the access by selecting “Approve for me.”
The output video was ready in around 10–15 minutes. However, we noticed a few issues with the output. Some scenes lagged, the cuts were not properly done and the background noise was not removed effectively.
We tested it on both a laptop and a desktop system. The editing took considerably longer on the laptop, while the desktop generated the output much faster.
When comparing the results with Claude and Antigravity, Codex's output was slightly less polished. For our test, we used the GPT-5.6 model with Medium effort.
ChatGPT Pros & Cons
Pros
Pro | Why It Matters |
|---|---|
Fastest of all tools | The video was ready in 10–15 minutes |
Easy project setup | Create a project, add the folder and start |
HyperFrames plugin support | One-click “Approve for me” access |
Cons
Con | Why It Matters |
|---|---|
Least polished output | Behind both Claude and Antigravity |
Laggy scenes | Some parts of the video stuttered |
Rough cuts | The editing cuts weren’t done cleanly |
Weak noise removal | Background noise remained in the audio |
Final Conclusion
All four tools edited our raw green-screen video, but the results were quite different.
Claude was our top pick for its clean edits and accuracy. It finished in 18 minutes on desktop, though it used 17% of our Pro usage limit.
Antigravity delivered decent results but missed some prompt details. Codex was the fastest at 10–15 minutes, but needed improvements to cuts and audio. Grok took over an hour and required repeated permission approvals.
Our takeaway: Choose Claude for quality and Codex for speed. A clear prompt and a capable computer can also make a real difference in your results.
Frequently Asked Questions
1. What is the best AI video editor in 2026?
The best AI video editor depends on your needs. In our test of AI coding agents for raw video editing, Claude Code delivered the most accurate results, followed by Grok, Antigravity and ChatGPT Codex.
2. Can AI edit raw videos automatically?
Yes. AI coding agents can help edit raw videos by removing green screens, adding captions and effects, cutting pauses and exporting vertical videos. However, the final output may still need manual review.
3. Which AI tool is best for editing videos with prompts?
Claude Code, ChatGPT Codex, Antigravity, and Grok can help edit videos using natural-language prompts. In our test, Claude Code followed the editing requirements most accurately.
4. Can ChatGPT edit videos automatically?
ChatGPT Codex can help edit local video files through a coding workflow, depending on the setup and available tools. It can assist with tasks such as trimming clips, adding captions and rendering videos, but results may require further adjustments.
5. Are AI video editing tools better than manual editing?
AI video editing tools can save time on repetitive tasks such as captioning, trimming, and applying effects. Manual editing offers more direct control, so a combination of AI assistance and human review can be useful for achieving a polished result.